Archive for the ‘TV Repair’ Category


TV Not Getting Cable Signal

Monday, April 1st, 2013

TV Not Getting Cable Signal - TV Repair

If your TV is not getting cable signal, there are a number of possible issues. This article will go over the possible issues and how to fix them.

TV Not Getting Cable Signal?

1. Make sure that your TV is actually on.

2. If you are positive your TV is on, check to make sure it is on the correct channel for cable television. This is a different set of channels than the basic TV stations that you watch such as ABC and NBC. In most areas the correct channel for television is channel 3, but it may be channel two or channel four in some places.

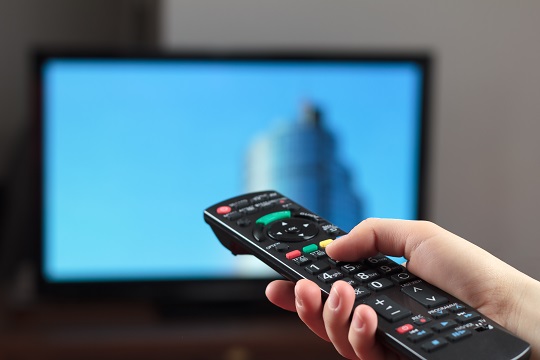
3. It is also possible that the problem is with your remote. Check that the batteries in your remote are not dead.

4. If all of the above are in working order, check the power switch sending electricity to your TV. If it is set to off, switch it on and then wait twenty minutes. Also check that your television is plugged in, that the cords connecting your television to your outlet are not damaged, and that the outlet you are plugging your TV into is not damaged by plugging another appliance into the outlet and see if it is working.

5. On either your A/B switch or the remote control, you should see a switch that has the option to be set to something labeled either “CATV” or “Cable.” Make sure that it is switched to this setting.

6. Ensure the cable connectors in the back of your TV are tight.

7. Try switching to different channels, if you are only having an issue on one channel, the problem is likely with that channel.

TV Not Getting Cable Signal…Still

If you try all of the above and you are still not getting a cable signal, call your cable company and see if they are having a problem in your area. If they do not believe they are having a problem in you area, the problem is likely with your television. You should contact a TV repair professional to check out your television. With the help of TalkLocal, you can be on the phone in minutes with up to three, high quality TV repair professionals in your area that are available when you are.


How to Connect Game Console to TV

Sunday, March 31st, 2013

How to Connect Game Console to TV - TV Repair

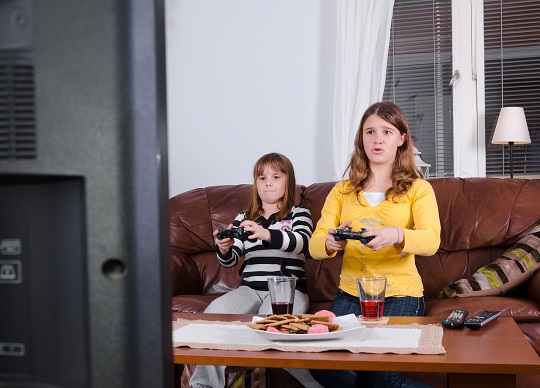
If you are unsure how to connect game console to TV, don’t worry, this is a relatively uncomplicated task.  All you need to do is make sure that you have the necessary cables, which should all come with the video game console package, and a TV.  A game console usually has a variety of output options, so you’ll mostly be choosing the connection based on what your TV accepts as input.

High Definition Multimedia Interface

This is probably the highest-quality option you can currently use with most game consoles.  All you need to do is plug in the HDMI cable (rectangular cable) into both the game console and the corresponding HDMI port on your TV, and switch to the right input on your television, most likely labeled HDMI.

RCA Connection

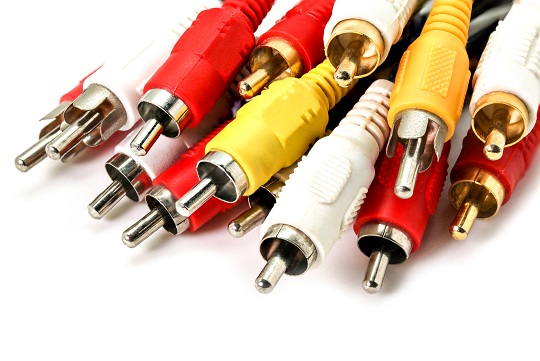
This is probably the most common type of input for older televisions.  You’ll be looking for the composite cable, which is the cable with the three colored prongs (yellow, white, and red) and simply plug those into the corresponding colored ports behind the TV.

Component Connection

This connection utilizes the standard RCA connection audio plugs (the red and white), but also has three other channels to deliver a full high definition signal.  These plugs are usually green, blue, and red, and will have ports that are listed under “component”.  Remember that you’ll need to plug in both the old RCA cables alongside the component cables.

Get Your Console Connected

The three options listed above are the most common types of video game connections you’ll see on today’s TV consoles.  If you have an older console that you want to hook up to your TV and don’t see the correct port, you may need a converter box or to talk with a television expert to find the correct adapter. TalkLocal can save you a lot of time by finding up to three, high-quality, local television repair professionals for you in just minutes.

How to Set Up TV Projector

Saturday, March 30th, 2013

How to Set Up TV Projector - TV Repair

Having a projector enhances the viewing experience of your TV. It instantly makes the screen easier on the eyes and larger. Although projectors can be expensive, the main reason that people shy away from purchasing a projector is because they fear that it will be too complicated for them to set it up themselves. Have no fear, and read this guide on how to set up TV projector.

What to Do

1. Assess the room in which you want to set up a projector. The room will need to be dark, so that the projections are shown clearly. You will also need a white, flat wall that the projector can shine onto directly. Also make sure that there is no heavy traffic between the projector’s place and the wall (in order for uninterrupted viewing).

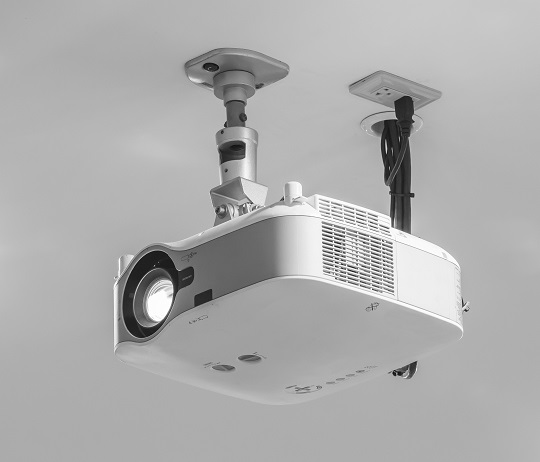
2. The projector can be either mounted from the ceiling or from the ground. Choose a placement that allows the projector light to hit your wall space evenly. and make sure that the projection lens is parallel to the ground. Depending on the location of the mount, drag and fix the electrical wires so that they are connected (the power wire and the projection wire).

3. Place the cords between the power outlet and the video output so that people stepping near the area will not trip over them. Then test if everything is connected properly by turning on the projector and the video output device and checking if you see any projections.

4. The projector turning on signifies that the connection between the power outlet and the projector is secure. The projector receiving an input (i.e. playing a channel) signifies that the connection between the video output and the projector is secure.

5. Check to see that the projection is not tilted in any way. If the projection is tilted, it means that the projector itself is tilted – adjust the knobs at the top or the bottom of the projector to achieve a straight, even projection.

Additional Help

If you feel like you need professional help setting up your TV projector, TalkLocal will connect you with up to three, reputable professionals in your area, in just minutes!

How to Install Satellite TV Dish

Friday, March 29th, 2013

How to Install Satellite TV Dish - TV Repair

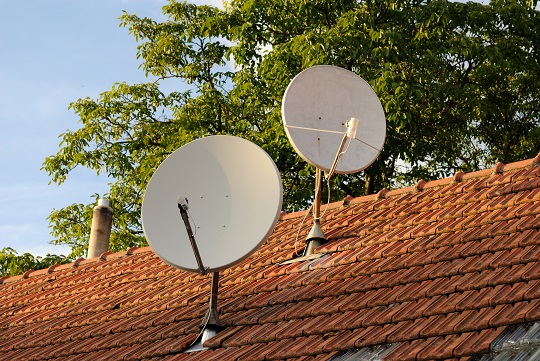
A satellite dish is one of the best ways to get both cable and premium channels. A satellite dish’s strength is in its channel package. Satellite dishes carry tons of channels that are not on cable. Installation of a satellite dish can be done by a professional from the service provider. If you want to save money instead of hiring a technician, here are the steps on how to install satellite TV dish.

Positioning

Positioning is the critical factor in installing a satellite dish. For the satellite dish to work properly, the dish must be in position with the service satellite in orbit. Due to the service satellite’s orbit, the satellite dish must be positioned south when north of the equator or positioned north when south of the equator. The satellite dish needs to be positioned where it can be easily fixed and have minimal interference from inclement weather. Avoid any obstacles that could obstruct the signal such as trees or electrical poles.

How to Install Satellite TV Dish

1. Unscrew the plate with a drill to expose the wiring for the dish.

2. Align the mount with the wall or roof.

3. Drill the appropriate holes that are needed to secure the mount to the wall or roof.

4. Fill the holes with caulk to prevent water from seeping through.

5. Drill the screws into the holes to secure the mount in position.

6. Position the satellite dish onto the mount and screw the bolts into the mount. Do not tighten the screws yet.

7. Assemble the low-noise block down converter (LBNF), and connect the coaxial cable to the low-noise block down converter or LNBF.

8. Connect the coaxial cable to a satellite meter to see if the dish can receive a strong signal in its current position.

9. When you find an optimal position for your satellite dish, tighten the screws to the mount.

10. Remove coaxial cable from the satellite meter and connect it to the TV receiver. Connect the TV receiver to your TV.

11. Test that you have a signal on your TV, and setup your new channels!

Find Professional Help

If you would prefer to have a professional TV repairman install your satellite dish, just use TalkLocal. We will find and connect you with up to three, reputable professionals in your area in just minutes!

How to Install Surround Sound System to TV

Thursday, March 28th, 2013

How to Install Surround Sound System to TV - TV Repair

Want movie-quality sound in your own living room? The a surround sound system is for you. Surround sound speakers can engross you in a film, just like movie theater speakers do.  Installation of surround sound is actually quite easy. Here is a list of how to install surround sound system to TV.

How to Install Surround Sound System to TV

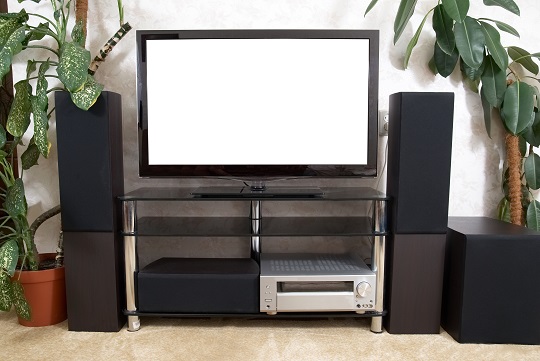
1. Remove the speakers from their packaging and identify the types of speakers. A usual surround speaker system has a sub-woofer, a center speaker, two front speakers, and two rear speakers. It will also come with a receiver, which is the hub that connects all of the speakers to the television.

2. Unplug any wiring on your TV to prevent any accidental electrical shocks. This includes the television, DVD or Blu-Ray players, cable or satellite boxes, or game consoles.

3. Remove the protective caps from the wiring on the surround sound speakers.

4. Connect the colored wires to their matching terminal on the back of the receiver.

5. Attach the other end of wire to the corresponding terminal on the speaker.

6. Connect the receiver to TV.

7. Place the center speaker either above or below the TV. Placement of this speaker mostly depends on your TV cabinet, but the receiver must be close enough to the TV that it can be connected.

8. Place the sub-woofer on the ground. If you only have one sub-woofer, center it with the television and main seating area. For two sub-woofers, angle them from the sides of the TV towards the center of the seating area. Don’t place the sub-woofer in the corner, as this will muddy up the sound. You want the sound to be as evenly distributed to as many seats in your living room as possible. Don’t connect subwoofer to A/V receiver with speaker cables.

9. Have the front and rear speakers at ear level, based on the seating area. Each front speaker can be placed on either side of the center speaker, positioned towards the audience. Each rear speaker can be placed on either side of the seating area, or slightly behind, angled towards the center of the TV.

10. Adjust your surround speaker system to find optimal sound. You want general sounds like speaking to be evenly distributed throughout the room. Deeper, louder sounds from the sub-woofer should be felt and heard, without drowning out softer sounds. Gradually turn up the sub-woofer’s volume to find its balance with the mid-range and treble.

11. Hide and secure wires along the floor or walls to avoid tripping on them.

12. Don’t assume that surround sound will be “surrounding” all the time. Watch some action movies to hear the surround sound at its best.

Bring In the Professionals

If you feel that installing a surround sound system is too much work, you can always hire a professional to install the speakers for you. For professional installation use TalkLocal. Just tell us what you need, where you are, and when you’re available, and we will connect you with the right professionals in your area.

Formatting Your HDTV

Saturday, March 9th, 2013

Formatting Your HDTV - TV Repair

You just got the perfect TV. It’s the right resolution and it’s the perfect size and price. But how do you format it to make the picture look great? We have some tips if you are having trouble formatting your HDTV. There will be a lot of cables involved, but the one you should pay the most attention to is the HDMI (High Definition Multimedia Interface).

Formatting Your HDTV: HDMI Cables

HDMI cables are the cables that carry high-resolution images and sound to your television. Don’t worry about getting the most expensive HDMI cables, as long as it is an HDMI cable you should be fine. But you should definitely get one. The size and resolution of your television are utterly unimportant without the HDMI cable. That little cable is the most important piece for ensuring the performance of your HDTV.

If you haven’t upgraded your other gadgets, you should do so ASAP.

1. Make sure that your DVD or BluRay player is ready for your HDTV. Go into the setup menu and make sure it’s set to output a 16:9 ratio image. If it’s an older player, you could set the resolution to 4:3 (like old TVs). If you set the aspect ratio to 16:9, the picture will look fantastic on your HDTV!

2. The same is true for your cable or satellite box. Make sure you switch the cable or satellite box to 16×9. If your box is capable of HD, take this moment to set it to output 1080i (but if you want it to show HD make sure you have that in your agreement with your cable company).

Additional Help

If you need more help formatting your HDTV, use TalkLocal! We can connect you with up to three professional television repair services in your area, in just minutes!

Magnavox TV Keeps Turning Off

Saturday, March 2nd, 2013

Magnavox TV Keeps Turning Off - TV Repair

Magnavox televisions are considered a thing of the past, but some people do still enjoy the antique feel of such a TV. The problem is, fewer and fewer parts are available for Magnavox TVs, making repairing a Magnavox increasingly difficult. A common problem with Magnavox TVs is that they have a tendency to turn off randomly. If you are someone with the issue of having your Magnavox TV keeps turning off, don’t worry – there are solutions.

What to Do If Your Magnavox TV Keeps Turning Off

1. Check the power cable and make sure it is completely plugged in and there are no breaks or openings in the wire. If everything appears normal, the next step is to consult your user manual to see if there is anything there that may help you troubleshoot the problem.

2. Your manual may instruct you to unplug your power cord for roughly 60 seconds before plugging it back in. This step allows your TV to reset itself, hopefully triggering something internally to remedy the problem. If this does not work, then your TV has a component failure.

3. Something else you can try is to replace your power cord. Oftentimes, this is the root of the problem and your television is turning off to protect the TV from harm.

Prevent Your TV from Breaking Down

1. There are steps you can take to prevent issues from arising with your television. Utilizing a wall mount can be helpful to help with airflow and prevent dust from accumulating around your TV.

2. Keep a fan around your TV to keep it cooled. Overheating can ruin parts within the TV, so taking steps to prevent overheating can be well worth it in the long run.

If you have tried the above steps and still find yourself having trouble with your television, it may be best to simply replace your old TV with a new one. Sure, getting it fixed may solve the problem temporarily. But it’s only a matter of time before something else goes wrong, as one bad part may cause a domino effect for other parts.


Additional Help

If you are having television issues and would prefer to consult a professional, consider using TalkLocal to find a reputable TV repair service for you. TalkLocal is a free service that will connect you with top-quality, TV repair companies in your neighborhood within minutes. Just enter in your specific problem, location and availability, and up to three companies will call YOU directly, saving you the time and stress of finding one yourself.

How to Connect Computer to TV

Friday, February 22nd, 2013

How to Connect Computer to TV - Computer Repair

You would think that your TV and computer are two separate electronic devices that wouldn’t work in tandem.  Technology is constantly evolving and changing, and today, it is possible to connect the two and use your TV as a large computer monitor.  Connecting a computer to a TV is a process but it is completely doable.

Why Connect Computer to TV? There are several benefits to connecting your computer to a TV!

– Your TV provides a larger screen for you to work from.

– Your TV may also have better resolution than your computer.

– You can use an Internet connection to stream and watch movies or TV shows online, on your TV screen.

– Connecting your computer to your TV enables you to use a TV sound system.

How to Connect Computer to TV

1) Turn off your computer and examine the back of it to find the cable plugged into the output of the video card.

2) There should be a DVI or VGA port located directly next to it.

3) Use a composite/S video/component video cord to connect the TV to the computer. These are only video cords so you will need to get another cable for audio. However, if you use a VGA cord you will get both video and audio.

4) Turn the computer on.

5) Configure your display settings to show on the TV properly by going to Start -> Control Panel -> Display -> Settings -> Advanced.

8) Make sure the aspect ratio is set properly (to make sure the computer screen image will fit completely in the TV screen) and adjust the resolution.

You should now be able to use your TV as a monitor for your computer.

Additional Help

If you have more questions about how to connect your computer to your TV, you should try to talk to a professional so that you can get the best help possible.  The easiest, fastest way to get in contact with reliable, local technology companies is to use TalkLocal. We will connect you with up to three technicians in your are who will be available to help you when you need them.

Should I Buy a LCD TV or Plasma TV?

Wednesday, November 21st, 2012

Should I Buy a LCD TV or Plasma TV? - Uncategorized - Seva Call Blog

Should you buy an LCD TV or a plasma TV? Here are some facts to consider and help you decide!

Image Quality

LCD can also boast increased image brightness and reduced susceptibility to glare, as well as lighter weight and thinner screens. If the TV is going to have sunlight or other bright lights reflecting off it during use, LCD may be the best choice. If weight and size are top concerns because the TV is going to be mounted on the wall, then LCD is a good choice for that too.

Plasma generally has a better contrast ratio, better color accuracy, greater color saturation, deeper shades of black, the ability to track motion without lag, and a wider side-to-side viewing angle. If the TV is mostly going to be used in a dark room and picture quality is the main concern, plasma is a great choice. Plasma screens look great, and few things inspire envy like a 60 inch plasma screen.

Consider your purse

Those wanting a budget TV with a smaller screen should look to LCD. Plasma screens also have higher electricity usage, so businesses and people watching their electric bills may prefer LCD for that reason.

Other Factors

Another (random, but valid) consideration, LCD is better for those more than 6,500 feet above sea level. At high altitudes, plasma screens have trouble adjusting and may make buzzing noises.

Technology is always changing, however, and the prices and capabilities of plasma and LCD will change along with it. Engineers are working to make LCD pictures sharper and more colorful, while others are working to make plasma technology lighter and thinner.

If you jsut want to keep your old TV, and not bother about buyig a new one, give us a call at TalkLocal to find professionals that can fix your favorite old TV for you!

Troubleshoot projection TV

Friday, September 21st, 2012

Troubleshoot projection TV TV Repair

When you are trying to troubleshoot projection TV, it can be frustrating, especially if there is a room of people waiting for you to figure it out. Sometimes, the instruction manual just can’t help you out no matter how thick it is. In your time of need, remain hopeful—this article is here to guide you through the process for fixing your projection TV, as well as provide insightful tips and tricks.

Plug

The easiest fix is one that you have probably tried – unplugging and plugging the TV. If you have tried this and still have no luck, then check that there is power coming from the outlet itself. Make sure the vents of your computer are not clogged and that your computer is fully ventilated to avoid overheating.

Bulb

The most common culprit for a troublesome projection TV is the bulb. Many times, the bulb is burnt out and this makes the whole system not function properly. If this is the problem, simply Google your brand of TV and find the corresponding bulb. If there is some picture showing—regardless of its quality—then the bulb is not the problem.

Alignment

If you are experiencing blurry or smeared looks, more than likely the projector is out of alignment. To fix this problem, recalibrate your TV by going to the calibration part of the menu. If your project was moved recently or bumped, that may be the cause of this issue.

Still having issues?

If you have checked all of the common problems and still have a malfunctioning projection TV, perhaps you should contact a professional. Check out TalkLocal to be directly connected to local, high-quality TV technicians that are willing to help you at the time that is most convenient for your schedule. Just go to the website and enter your location, availability, and service need. It’s that easy!