Archive for the ‘talklocal’ Category


How To Repair Concrete Steps and Curbs: Fixing A Crack Won’t Break Anyone’s Back

Friday, July 31st, 2015

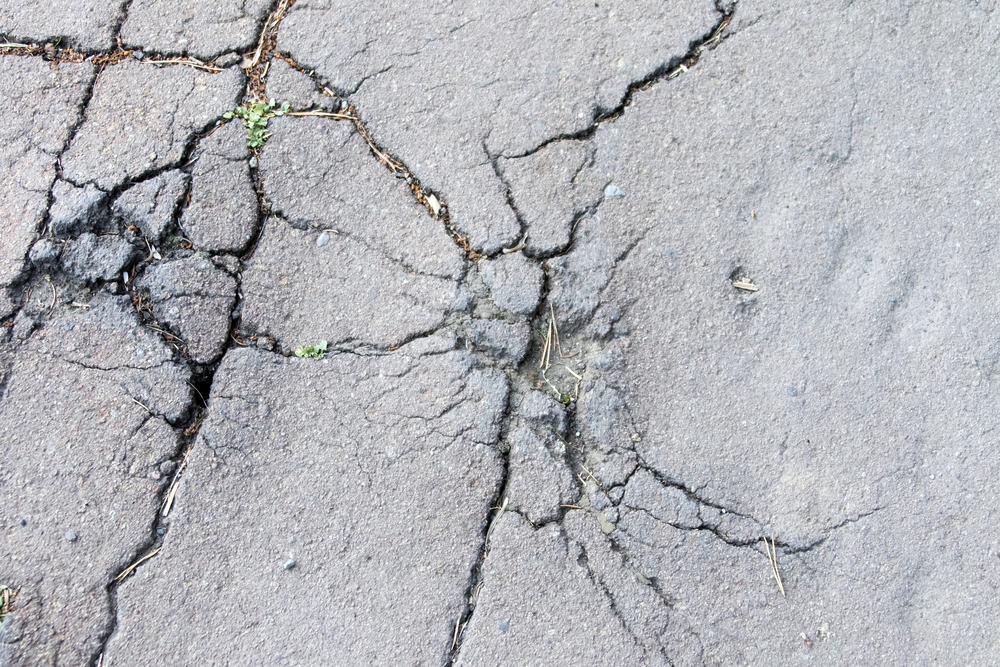
Whether or not you’re the type of person who’s bothered by slight blemishes like a crack in concrete, those little fractures need your attention – ice, dirt, and roots can deepen the crack until it becomes both hazardous and unsightly. Fortunately, learning how to repair concrete steps and curbs isn’t always backbreaking.

Here are some tips for DIY repair of three common problems: crack large and small, chipped stairs, and damaged curbs.

The required materials, standard fare at any local hardware store, include:

How to Repair Cracks in Concrete

Small cracks don’t require concrete to repair; instead, you can just grab masonry crack filler, which can be used with a caulking gun. Brush the area clear of dust and debris and wash it down with a hose. After it’s dry, just apply the filler and trowel off any excess.

Bigger cracks require a hammer and chisel. These are used to undercut the edges of the crack, which will allow the vinyl patching compound or mortar to set in more securely. After undercutting, sweep away debris and wash the crack down. Mix the patching compound per manufacturer instructions and tamp it in with the trowel, then smooth it down. As it sets, scrub with wire brush until it matches the surrounding area..

How to Repair Chipped Concrete Steps

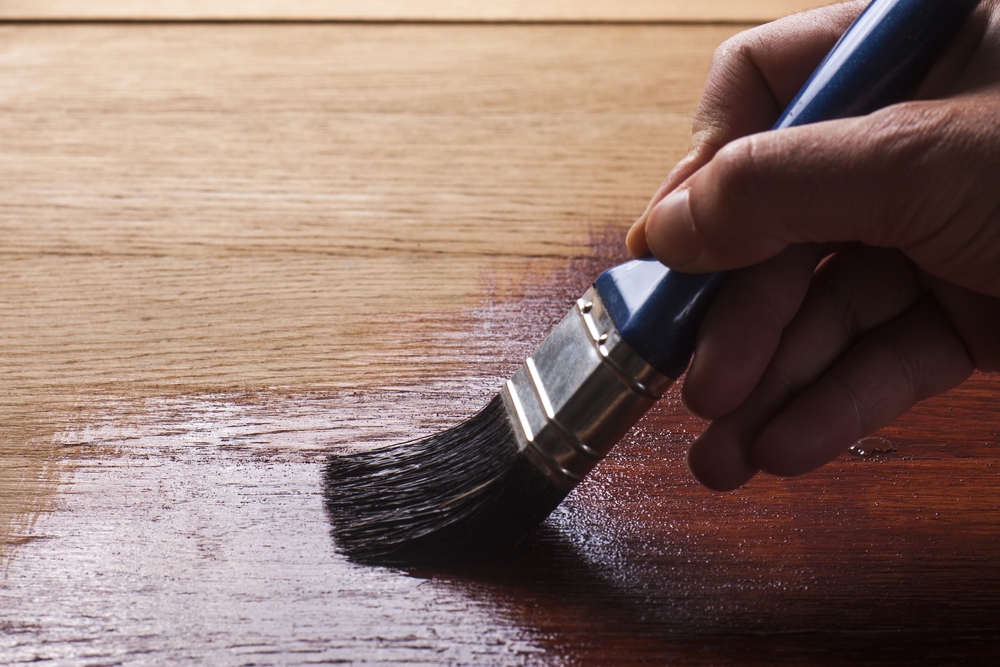
If your steps are significantly damaged or chipped on a corner, the procedure is the same as repairing a crack, but it will require mixed concrete, a trowel, and straight planks to use as a form. Just place the planks flush the planks against the steps, clean up the steps with the brush and hose, and apply the concrete and bonding agent.

How to Repair a Concrete Curb

If the curb is too damaged, you’re going to need a jackhammer to clear up the broken pieces. After breaking up the blemished areas, sweep away debris and apply the concrete as previously instructed.

More extensive damages may require replacement of the whole curb – in this case, contact a contractor or your local government.

Want to hire a handyman restore your concrete curbs and steps to their maximum appeal? TalkLocal matches and connects you by phone to a top ranked handyman who knows your problem and wants to help on your schedule. And it’s free! Just describe the task you need done, when, and where. Then stand by until you hear from a handyman near you. Visit TalkLocal to get started.

How To Fix a Kicked In Door (we don’t need to know why)

Wednesday, July 29th, 2015

Someone in your household has decided that life is too short to be stopped by a hinged block of wood and, as a result, has delivered terrible wrath upon your door. Whether you’re a frat boy doing damage control before your chapter’s president does his rounds or an irritated homeowner seeking to save money, you might be able to fix a kicked in door yourself – it just requires a bit of time and a few materials from your local hardware store. (If you’re the victim of a break-in, be sure to call the police before attempting to fix your door, as it might become evidence in a criminal investigation.)

Here are a few steps to restore your door to its former glory:

1) Obtain all the necessary materials. You will need a putty knife, diagonal pliers, a screwdriver, wood glue, clamps, chisel, 11/4-inch finish nails, a hammer, a set of nails, a putty crayon, and a stain marker. In some cases, you may also need replacement casing, and a miter saw…and it’s not a bad idea to get thick gloves for safety.

2) Determine specifically how your door has been damaged. Typically, a door is broken in by a kick landing just above the knob, which causes a split in the jamb (the part of the frame across the stop from the hinges) running up to the casing (the top part of the frame). Remove the casing with the putty knife and use the pliers to remove any remaining nails.

Door Diagram

3) Carefully remove any parts of the wood that are chipped off using the putty knife. If the casing is damaged, it must be replaced.

4) Look at the strike plate, the long piece of metal nailed into the frame around the lock. If the crack runs behind it or the strike plate is damaged, remove it using the screwdriver.

Strike Plate.png

(Credit)

5) If the jamb has been displaced, push it back to its original position and clean out any debris using the putty knife. If the jamb cannot be pushed together tightly, it must be replaced. Put the glue on the putty knife and spread it on the inside of the crack, and then push the sides of the jamb together with clamps until they fit together tightly. Let the glue dry for an hour, and then remove the clamps.

6) Screw back on the striker plate, if necessary.

7) Nail the casing back onto the frame with the nail set and hammer. Putty any holes with a putty crayon of matching color, and use the stain marker to color over where the jamb was split, after removing excess glue.

Of course, if you’re short on time or the damage is too extensive, head over to TalkLocal – we’ll help you find the perfect contractor without the research-schedule-wait headache.

Cut the Red Tape: About Building Permit Laws

Monday, July 27th, 2015

shutterstock_309800942

Nobody likes dealing with rules and regulations, especially not when it comes to building permits. However, whether you’re a tenant or a contractor, you’ll almost certainly have to, but don’t worry because they’re not as complicated as they seem.

 The Basics

It may seem surprising, but building permit laws are there for your protection – they ensure that contractors abide by construction standards, which means safer buildings for tenants. Their requirements also can help you figure out exactly how to go about your bigger DIY projects.

Almost any construction project requires a building permit, so whether you’re a contractor building a new home or a tenant trying to build new additions, it’s a good idea to familiarize yourself with local codes.

Minor projects like repairing walls, changing faucets, and painting don’t need permits, but there are specific permits for different types of projects, like plumbing and electrical work.

 How do I get a building permit?

If you’re working with a contractor, your best bet is to let them handle the application; they’ll have the information and experience necessary to undergo the process, and are better-suited to take on the liability. Be wary of a contractor who resists taking out a permit – if they insist a permit is unnecessary, verify with your own research.

If you’re handling the project yourself, you can either go about the process yourself or find a building permit service. In the former case, you’ll need to present a building official with your plan; more extensive projects are best planned by a specialist like an architect, but you can draw up simple ones yourself. The official will then review your application for up to a few weeks.

Some municipalities offer pre-approved permits for projects that conform to a standard plan. It’s a good idea to check if your local government has a pre-approved plan for your specific project; this will both save time and provide helpful guidelines for your work.

Permit fees can range depending on the scope of your project. Small-scale projects can cost as little as $50, while larger ones may cost a few hundred dollars.

 Building Permit Inspections

After receiving your permit, the official will carry out a number of inspections that varies by the scope of the project. The official taking out the permit plans these inspections, so be sure to ask which inspections are necessary and schedule accordingly. For example, a contractor building a new home must have the ground upon which he intends to pour concrete inspected.

The building inspector will only check for relevant concerns; for example, if you’re building a new wall, the inspector will not make sure your plumbing is up to code.

After Inspection

Inspections span the actual construction process, so after the last inspection, you’re done! The inspector may present a certificate that proves your project is up to code. Proudly display this certificate in your storage closet.

Securing a permit can be a hassle that you may not have time for; however, a skilled contractor can take care of it for you without you even needing to stand up! Get a leg up on your next project by heading to TalkLocal – enjoy free access to the  unique search system that makes finding local service professionals a breeze.

Top Energy Efficient Appliances: Saving More Than One Type of Green…

Friday, July 24th, 2015

shutterstock_153253364Have you ever heard the story about a woman who switched out a refrigerator from 1973 for a refrigerator made in this century, saving $400 every year? In fact, more and more energy efficient appliances are hitting the market every year. So, if you’re torn about whether to repair an old appliance or replace it, look beyond the sticker price and think about your utility costs. Your appliances might not be as old as our example, but the energy use of your current appliances could be driving higher energy costs than it should given modern advances. Upgrading your appliances can drastically reduce this utility cost and increase your home’s energy efficiency, saving a whole lot of both types of green.

Don’t know where to start? Here are some of the top energy efficient appliances on the market in 2015:

–        Refrigerator: The Mighty Samsung RF261BIAESR

The Samsung RF261BIAESR is large and sophisticated, with a total capacity of 25.5 cubic feet due to an extremely efficient array of internal shelves, bins, produce crispers, and a separate pantry with its own temperature control. This refrigerator has rightfully earned an EPA Energy Star label, which means that besides being extremely affordable and functional, product testing verifies that it’s significantly more energy-efficient than most others on the market. Indeed, this appliance uses a 398 kWh/year while many refrigerators almost double that.

 –        Washing Machine/Supercomputer: LG WM3170C

LG WM3170C, a $879 front-load washer of 4.28 ft^3 volume, uses its 90 kWh/year with staggering efficiency, boasting seven different cycle options, anti-vibration technology, and an LED display. If seven cycles aren’t enough for you, this washing machine can be synced to a smartphone to download even more.

 –        Boiler: The Wallet-Saving Bosch Greenstar

Most Energy Star-certified boilers net you 19% savings on energy costs when compared to your average boiler, but they reach as high as 40%, even though those units can be more expensive than they’re worth. The Bosch Greenstar series includes high-efficiency, ultra-compact, and quiet boilers for any home size – the low energy usage will pay for a big chunk of the cost of switching out your current boiler in just a few years.

 –        Dishwasher: The Crowd-Pleasing Whirlpool Gold WDT720PADM

The $400-600 Whirlpool Gold WDT720PADM washes your dishes at 44 decibels, little more than a hum in the background, accommodating all sizes with an adjustable upper rack, fold-down tines, and a silverware basket – all using an Energy Star-winning 260 kWh/year. It’s no wonder this dishwasher’s over 1000 votes average near five stars on Lowes.com.  Picture3.png

 Need quick and reliable installation for a new appliance? TalkLocal has you covered: go to TalkLocal and use our unique search system, which will turn the hassle of researching and scheduling into a walk in the park.

Find the Right Contractor Using These 10 Top Consumer Review Sites

Wednesday, July 22nd, 2015

shutterstock_345238313

Whether you’re dining at a restaurant or you’re in line at the department of motor vehicles, receiving poor service is always a hassle. But, when poor service comes at the hands of a mechanic, contractor, or other professional who you’ve entrusted with the care of your car, home, or loved ones, it can be disastrous. This is why it’s important to research and make sure you find the right contractor before hiring them to work on the things that matter to you the most. In addition to finding a professional that suits your price range, schedule, and job needs, you should always read consumer reviews.

If you already have a local professional in mind, a quick Google Search may be all it takes to get the review information you need. But, if you haven’t yet found a professional, online reviews may do a better job of helping you connect with the professionals with the best reputations; rather than the professionals that are merely nearby, or listed early in an alphabetized directory.

Here are 10 of the most popular online review sites nationwide:

600px wideWarning: Although these are trusted review sites, you should still keep an eye out for fake reviews. Here are some ways to spot a phony review:

   1) The minority report – The review that seems the most popular, most liked, and comes up first in the list does not reflect the overall feedback regarding a company. Never rely on just one review.

   2) Disregard the extremes – In general, people don’t actually love or hate a business interaction. So, reviews approaching such extremes may be biased.

   3) Vague language – Compare a user’s review of another service along with the one you are looking for. If they’re both vague and have the same ‘cut and paste’ language, then they are most likely fake reviews. Trust your gut.

Check out this blog for more information in discarding fake or biased reviews. If it’s a really big job, you should also ask to speak to one of his or her references personally just to make sure.

Of course, it would be much easier to get a complete picture of businesses in your area if you could read thousands of online reviews, social media interactions, and other critical information in mere seconds.

With TalkLocal, you just enter what you need, where, and when; our software collects business ratings and reviews from across the web and connects you with up to 3 top-rated professionals in about 90 seconds. That way you can compare quotes, verify availability, and do research only on the professionals that want to do business with you.

So, if you’re still looking for that right contractor, let TalkLocal find them for you.

Author’s Note: All website descriptions are from Crunchbase and the Franchise Opportunities Journal.

Happy Cousins Day: Looking Back on Helpful Family Members

Monday, July 20th, 2015

The internet is sparse on Cousins Day history, but we figure the history of the holiday isn’t so important – what matters is the history of  your family. Your cousins are helpful for a variety of things: growing with them helps us frame our own change over time, they provide a familiar but separate perspective, and they’re always prepared to lend a hand in helping out with projects. I live near my cousins now and they’re always thrilled to help out with DIY projects; it’s like a small family reunion with a fun collaborative element. However, some projects with the family are much larger than others.

I remember when my town took the brunt of a hurricane – luckily, nobody was hurt except for our homes. A house down the street literally had a tree speared through its roof like an angry giant had rampaged through the neighborhood. The trees were more merciful to my house; one had fallen and somehow taken the shingling with it and my fence was broken in a few areas.

My plan wasn’t to call them up; I figured they had their own repairs to worry about. But a day hadn’t even passed before my cousins, George and Maria, were knocking on my door with toolboxes in hand; they were going to help me whether or not I wanted it (but of course I wanted their help). Luckily, George, who had been something of an older brother in my younger days, was a contractor who specialized in roofs (Convenient, right?). He told me not to worry about the shingles; Maria and I were to handle putting the fence back together.

So, we went to the hardware store, got a few saws, hammers, nail sets, cans of paint and brushes, and got to work. Fixing anything, I learned, is considerably easier with a partner. I handled sawing the wood and she put it right into place; after two days’ work, we had fixed several yards of my fence.

Maria actually proved herself more helpful than a contractor. After the fence was finished, I was content to stop and relax, but she kept pacing up and down the yard. I asked her what she was thinking about, and she replied that the fence would really look better painted blue. She explained that the flowers in front of my house were mostly blue, so the blue would frame the green of the lawn, which would look nice. A contractor would have fixed the fence, received his pay, and called it a day.

I decided to go with the idea, changing the white paint to a nice sky blue, and it turned out Maria was right: it was beautiful. My front yard had gone from a regular green suburban lawn to a picturesque arrangement of colors, and George’s shingling was the most precise I’d ever seen.

However, for some tasks, like the speared house up the street, not even my entire, gigantic Italian extended family could have restored its former glory. When even twenty family members can’t tackle a project, head to TalkLocal and we’ll find you the best contractor available for the task at hand.

Happy Cousins Day to you and your family!

How to Properly Light an Outdoor Charcoal Grill

Friday, July 17th, 2015

outdoor charcoal grillGood meat needs good flavor and that’s why barbecue was meant to be done over charcoal. That uniquely American style of cooking has been around for centuries, but gas grills only a few decades, so there’s no better way to get an authentic flavor than a charcoal grill. And, while charcoal can be a little tricky to light, we have the tips to illuminate the process for you.

There are two ways to light a charcoal grill: one way uses lighter fluid, the other does not.

Lighting a Outdoor Charcoal Grill without Lighter Fluid

What You Need:
Newspaper
Chimney Starter

1. Place newspaper into the bottom compartment of the chimney starter and charcoals in the top. Set the chimney starter down on the grill.

2. Ignite the newspaper using a stick lighter. The newspaper will start the charcoals from beneath.

3. Once the charcoals are coated in gray ash and glowing, pour them out of the starter and spread them out.

4. Cook your heart out!

Lighting a Charcoal Grill with Lighter Fluid

1. Put the charcoals into a mound or pyramid and douse well in lighter fluid. Take care not to get any on your hands.

2. Before the fluid dries, light with a stick lighter.

3. When coals are coated in gray ash, spread across the grill.

4. You’re ready to cook!

Some brands of charcoal will come coated in lighter fluid. In this case, just put them in a mound and light. Afterwards, follow the instructions from the previous section.

Are you preparing for a cookout? Wow your guests with a bit of creative landscaping from one of the many trusted professionals at TalkLocal. Our free search system will find you the perfect pro before those coals turn gray.

DIY Furniture Makeovers: Don’t Let your Furniture Decay!

Wednesday, July 15th, 2015

shutterstock_223684648

Is your furniture starting to look “antique”? The story behind those white rings on your coffee table – “I, uh, left some Chunki Chikin Soup® on it” – won’t draw conversation like the history that paints the family china, so it’d be best to keep it looking new. It would be an expensive hassle to regularly get professionals to retouch your furniture – so if you have some extra time on your hands, save yourself some trouble by trying out some of these tricks for DIY furniture makeovers.

Getting Started

Look over the furniture for blemishes like white rings, cracks, or degraded finish – applying mineral spirits will highlight them.

Cleaning Up

Dip a sponge in a mixture of soap and water and gently scrub the finish. Wring the sponge, rinse, and dry using a towel.

Removing White Rings

Remove minor white rings by applying petroleum jelly and letting it sit overnight. Worse white rings require special products and severe rings require the attention of a professional.

Removing Paint Stains

Remove any paint stains with a modified razor blade. Just wrap a bit of masking tape on both ends of the blade, and when you hold it, bend it slightly to get it close to the paint without actually touching the wood. Scrape the paint carefully.

Removing Blemishes

Apply gel stain to the surface to cover up small blemishes. Soak up the gel stain with a cloth and wipe it across the finish, and then remove the excess with another cloth. It takes time to dry, so if you change your mind, you can remove it with mineral spirits before it sets in.

Filling Cracks

Fill in any small cracks with wax from a wax stick. Break off small pieces, warm them in your hands, and work them into the length of the crack using a thin tool. Clean up any extra wax with a cloth.

Updating your Finish

After you’re finished, apply wipe-on finish with a rag in small swirls. Wipe off the excess in the direction of the grain, and let it dry overnight.

It’s surprising how much better your furniture can look after these simple procedures. They won’t work for glaring issues, however; if there are extreme blemishes in the finish, deep white rings, or it needs stripping, get a professional – head to TalkLocal and we’ll fix you up with one furniture upholestry professional before you know it.

Easy DIY Landscaping Projects – Make your Neighbors Jealous

Monday, July 13th, 2015

shutterstock_244704934

What does your yard say about you? It might rest outside the walls of your house, but your yard is still part of your home. We burn through hours deciding between pieces of furniture, color swatches, and carpets to make our houses comfortable and expressive; meanwhile, more see a yard than a living room, and the natural beauty of good landscaping is nearly unmatchable. It may seem daunting at first, but we’ve put together three easy DIY landscaping projects to beautify your lawn.

Creating a Space

An important idea in landscaping is that yards shouldn’t just be expanses of green – angles, balance and color should be used to make a yard feel like a space, like a room in a house. Find a diagram of your yard and understand what sort of space you’re dealing with, and then look around your yard to get a feel for it. What sorts of natural landforms are there? If you were to imagine your yard in terms of rooms, what would the rooms look like, what would you do in them, and where would they go? You can create your “walls” through straight angles between trees, flowers, and bushes, or by utilizing walkways.

Gardening

Gardening will allow you to create dynamic and beautiful spaces through arrangement of differently shaped and colored flowers. With a little work and research, you can make something much more impressive than a small square filled with flowers – use the colors to border your house and add personality, or different scents to fill your space with a calming aroma. For a real gardening challenge, try to arrange flowers so they create a vibrant walkway.

Special Landforms

You can also diversify your yard with interesting features, such as rock walkways or small bodies of water. They’re actually very easy to introduce to your yard. For rocks, just imagine what you want them to look like, and buy rocks of the appropriate shape. A small pond is a weekend project: start by contacting your town government to get digging approval, get a pump, materials to line the bottom of the pond, and whatever plants or rocks you wish to decorate its outside.

But we’re all busy, and maybe landscaping isn’t your thing. Luckily, there are professionals who can handle any task, especially landscaping. With our unique search system, all of the obstacles to hiring a professional, such as scheduling, quality, and availability, are things of the past. Don’t waste any of your precious time – head over to TalkLocal now and find the perfect local service professional in half the time it’d take to find your old shovel.

3 Ways to Keep Your Car Clean

Friday, July 10th, 2015

shutterstock_333946184

Cleaning a car is one thing, but keeping that car clean is another challenge in itself. One of my greatest frustrations involves me spending hours cleaning out my car and then, two weeks later, my carpets look like this:

 Untitled design

It’s amazing how quickly grit and grime accumulate in car upholstery. It’s as if my carpet has been a welcome mat for camping grounds on a construction site on sandy beach front property. And trust me, the picture makes that carpet look better than it is.

Surely, there must be a solution to help keep cars clean that doesn’t involve doing a thorough cleaning every two weeks. Luckily, there is!

Here are a few ways to keep your car clean:

1.       Keep a trash can in the car

You can buy a fancy trash can (like this one), or you can simply use a plastic bag. A lot of times, we leave trash in our car with the intention to take it out later. But, this doesn’t always happen. A trash can solves this problem, so you won’t have to worry about trash being all over your car.

2.       Use ceramic car coasters

When I first saw this, I didn’t think too much about it. However, it turns out that cup holders carry a lot of grime from sticky juice to just overall dirt. From my experience, cup holders are hard to clean out. Ceramic car coasters solve this problem by keeping dirt and grime away from the actual cup holder.

 shutterstock_342970751

3.       Keep a cleaning kit in your car

You probably keep a bunch of cleaning supplies such as Windex, toilet cleaners, brooms, vacuums, etc. in your house. While you won’t need all the supplies you keep in your house, it is good to keep a couple of cleaning supplies in your car. Simple things like cleaning wipes, dusters, or even a small vacuum can help to maintain your car’s cleanliness. One day, you may spill some Sprite on your seats. Another day, you may sneeze on your dashboard. So, knowing how exhausted and distracted you may be once you finally get home, it’s best to have some tools readily available to clean whatever mess you may make right away.

At the end of the day, let’s not forget that most of us are not car cleaning experts. So, if you ever need a more thorough cleaning, TalkLocal can help you find local car washes.

Good luck and happy cleaning!