Posts Tagged ‘remodel’


How To Fix a Kicked In Door (we don’t need to know why)

Wednesday, July 29th, 2015

Someone in your household has decided that life is too short to be stopped by a hinged block of wood and, as a result, has delivered terrible wrath upon your door. Whether you’re a frat boy doing damage control before your chapter’s president does his rounds or an irritated homeowner seeking to save money, you might be able to fix a kicked in door yourself – it just requires a bit of time and a few materials from your local hardware store. (If you’re the victim of a break-in, be sure to call the police before attempting to fix your door, as it might become evidence in a criminal investigation.)

Here are a few steps to restore your door to its former glory:

1) Obtain all the necessary materials. You will need a putty knife, diagonal pliers, a screwdriver, wood glue, clamps, chisel, 11/4-inch finish nails, a hammer, a set of nails, a putty crayon, and a stain marker. In some cases, you may also need replacement casing, and a miter saw…and it’s not a bad idea to get thick gloves for safety.

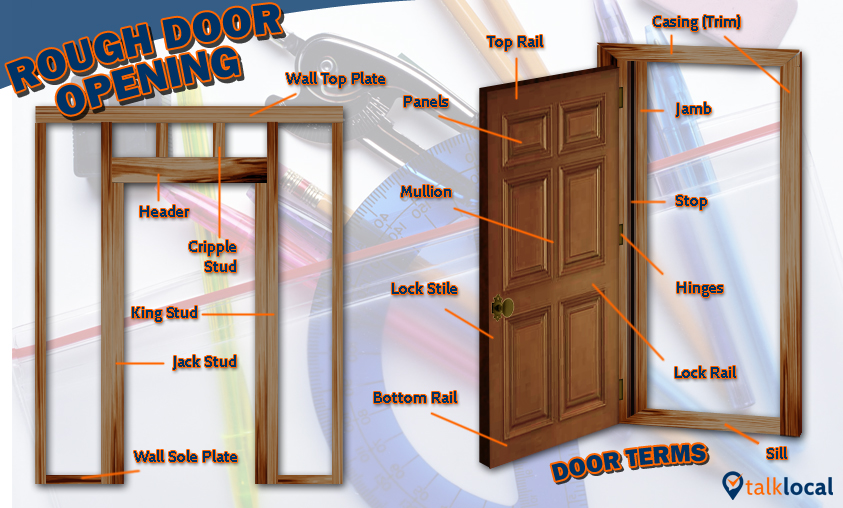
2) Determine specifically how your door has been damaged. Typically, a door is broken in by a kick landing just above the knob, which causes a split in the jamb (the part of the frame across the stop from the hinges) running up to the casing (the top part of the frame). Remove the casing with the putty knife and use the pliers to remove any remaining nails.

Door Diagram

3) Carefully remove any parts of the wood that are chipped off using the putty knife. If the casing is damaged, it must be replaced.

4) Look at the strike plate, the long piece of metal nailed into the frame around the lock. If the crack runs behind it or the strike plate is damaged, remove it using the screwdriver.

Strike Plate.png

(Credit)

5) If the jamb has been displaced, push it back to its original position and clean out any debris using the putty knife. If the jamb cannot be pushed together tightly, it must be replaced. Put the glue on the putty knife and spread it on the inside of the crack, and then push the sides of the jamb together with clamps until they fit together tightly. Let the glue dry for an hour, and then remove the clamps.

6) Screw back on the striker plate, if necessary.

7) Nail the casing back onto the frame with the nail set and hammer. Putty any holes with a putty crayon of matching color, and use the stain marker to color over where the jamb was split, after removing excess glue.

Of course, if you’re short on time or the damage is too extensive, head over to TalkLocal – we’ll help you find the perfect contractor without the research-schedule-wait headache.

DIY Faux Brick Wall Installation: Swanky Indoor Styles

Friday, July 3rd, 2015

shutterstock_322214192

Brick is everywhere these days – restaurants, swanky bars, modern homes – and for good reason: nothing adds a rustic touch like indoor brick walls. DIY faux brick wall installation isn’t that hard and it’s much cheaper; also, like laminate flooring, it looks convincing. Follow these easy steps to spice up your home.

1)      Measure your wall and decide how many bricks you need, as well as if you’re going to need to create special templates for windows and light fixtures, which can easily be done with cardboard and a box cutter or scissors. Faux brick wall tiles can be bought at almost any DIY store, or ordered from Home Depot online.

2)      Decide on a color scheme. You may be able to choose any, but in some cases, important furniture will require that you use certain colors. Though you can buy faux brick in almost any color, they can be painted to whichever you like.

3)     Saw the panels to conform to your templates.

4)      Get a hammer, nails, safety gloves, a nail gun, and caulking equipment. The panels can be easily affixed to the wall, no catch – just make sure you’re not obstructing objects on your walls by properly cutting down the panels.

5)      Make sure to caulk the panels down to fill in any cracks or spaces.

Small DIY home improvement projects like these can be fun and easy – but if you have a bigger project on your hands and lack the time or space to do it, get a professional. Head over to TalkLocal and we’ll fix you up with the perfect contractor for all your home improvement needs.

Summer How-To: How to Brighten Up a Room

Wednesday, June 4th, 2014

Many of us are not able to leave the house and vacation in the tropical islands of the Maldives over the summer, but that doesn’t mean our home has to feel like a dark box trapping us May through August. With help from a few tools, or even a handyman if you are unable to find the time to do so yourself, here’s how to brighten up a room for the summer:

Walls: Go for light colors, such as white or an off-white shade. If you don’t feel like painting all the walls white, you can definitely opt to paint one wall as an “accent wall”. If the room has big windows, this can help reflect the natural light when it enters the room, brightening the entire room.

Decor: To contrast the white walls, go for a pop of color with your decor. Colorful vases, coasters, or trinkets set around the room can make the room feel brighter and even happier.  You can decide to take the neon route (neon greens, blues, pinks) or traditional bright colors (teal, cyan, magenta, etc). For your windows, keep it simple with white blinds and if you want curtains, minimize and emphasize the natural light.

Furniture: The style of furniture in your newly brightened room is pretty flexible. Some may want a more beachy feel, going for wicker style chairs and wood colors with white accents. Some may want to continue with the color scheme of the decor and choose colored sofas and pillows. (Tip: To not only brighten your room but make it seem larger, aim for furniture with a minimalist silhouette and/or low sitting profiles.)

Remember that you are not alone in this process, TalkLocal is here to help you find a handyman, painter, or window replacement company at a moment’s notice!

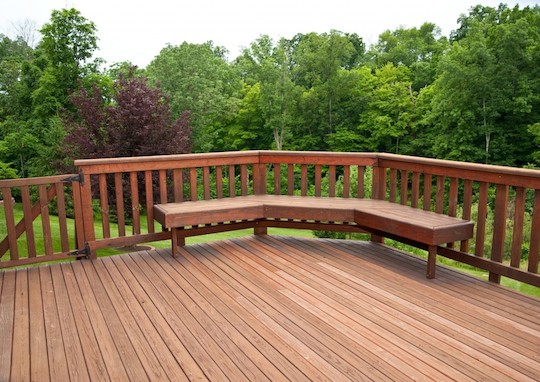
Refinish Wooden Deck

Thursday, January 9th, 2014

Refinish Wooden Deck - Painters

The wooden deck behind your home is a place where many memories are made. Be sure to protect and extend the life of the wood by refinishing the deck. Doing this will make your deck look fantastic as well as improve your home’s resale value.

Here are a few basic steps to help you refinish wooden decks.

Inspect the State of Your Deck

To start the refinishing process, begin by inspecting the wood deck for any structural problems. A wood deck endures many environmental challenges. There may be loose boards, as well as rotting or severely split wood. It’s best to fix those issues before beginning the actual process of restoring the deck.

Power Wash the Deck

The critical component of deep cleaning a wooden deck is to power wash it.  To do this, use a power washer with a water pressure that is as low as possible while still being effective. Cedar, pine, and other softwoods should have a water pressure around 500-600 psi. Increase water pressure for harder woods, but do not go higher then 1200-1500 psi.

Sand the Wood

After the power washing is complete, it is time to move on to sanding the wooden deck. The reason behind this is due to wood fibers that could have risen during power washing. These fibers do not go down and could cause splinters, so sanding the wood gives it a smooth, even finish.

Apply the Wood Stain

Once you have completed the preceding steps, it is time to get your tools and begin staining the deck!

Start with the handrails, and work your way down to the deck boards. Use a smaller brush for areas such as handrails and trim boards. Flat paint pad applicators can help cover large areas while providing a nice even coverage of the stain

Seek Professional Help

There are many stages of this process that you may not know how to do or possess the necessary tools to complete. For help, use Seva Call. We will connect you with professionals who can fit into your schedule. Contact Seva Call now, so you can begin preparing your deck for a wonderful spring!

Types of Wood for Cabinets

Wednesday, October 16th, 2013

Types of Wood for Cabinets - Handyman

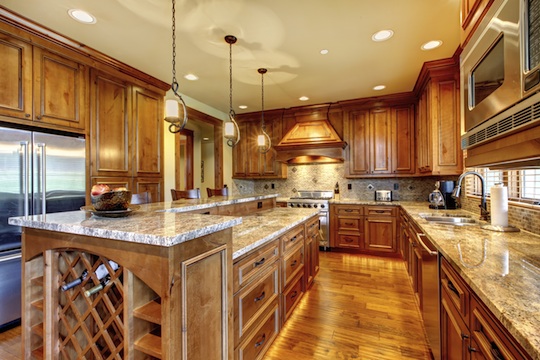
Modern, tasteful, durable wood cabinets can beautify even the dullest indoor spaces, adding value to your house and reflecting your unique sense of style. These days, one could easily find various types of wood for cabinets, displaying different features and different price tags. Which type is best for you? Decide based on your aesthetic requirements, real necessities, demands, and financial possibilities.

Identifying the Most Appealing Types of Wood for Cabinets

With so many appealing alternatives, how could you possibly make an inspired choice? Discuss your option with a handyman and analyze different color and grain variations. Red oak, red birch, maple, walnut, alder, and cherry are only a few options worth considering if you want to take pride in durable, high-quality, rustic, or sophisticated cabinets giving a personal touch to your room.

Designing the Perfect Cabinets for Your Home

If you want to design your very own cabinets, make sure you opt for those particular types of wood that are inexpensive, widely accessible, extremely strong, and durable. If you love golden tones, don’t hesitate to go in favor of a cabinet made from white oak.

Conversely, red oak could be the best kind of wood for your project, due to its affordability and remarkable versatility. It is available in different finishes and styles.

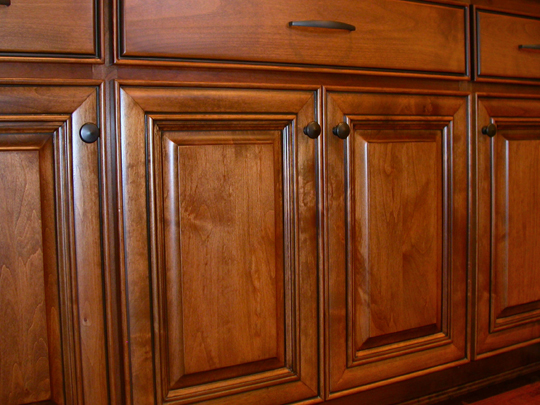
Cherry is ideal for elegant, traditional cabinets. This wood is well liked for its beautiful reddish-brown color, and it is usually stained to obtain a uniform color.

Pine cabinets are the perfect option for you if you adore the discreet shades of pale yellow of this type of wood and its numerous knots, making it perfect for rustic decors.

Count on an Expert Opinion

Undoubtedly, finding the most amazing types of wood for cabinets can be confusing and time-consuming. Narrow your search by counting on expert advice from an experienced local handyman. Find the best ones by relying on TalkLocal, a free service launched to make finding the right professional quick and easy.

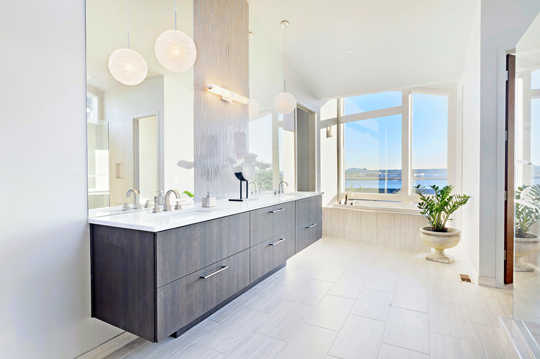
Small Bathroom Makeovers: Storage and Design

Monday, October 7th, 2013

Small Bathroom Makeovers: Storage and Design - Handyman

New Flooring and Tiling

Small bathroom makeovers need not be expensive. You can install your own bathroom tiles for the fraction of the cost that bathroom experts will charge you.

1. First, you need to purchase enough tiles for your bathroom floor, accounting for any corners and spaces.

2. Then, you need to mix thin-set mortar to the appropriate consistency or use adhesives that are recommended by the manufacturer.

3. Spread the adhesive or thin-set mortar on the bathroom floor, beginning with the center, and lay the tiles, again, beginning with the center.

4. Make any cuts that you need with the tiles using a wet-cut tile saw.

5. Allow the tiles to dry overnight or as recommended by the adhesive manufacturer.

Cabinets and Storage Space

These tips will show you how to select the proper bathroom cabinets that are right for you.

1. The first step is to know how to use your space. For example, if you have a hot tub and you like taking long baths, you might like to have a cabinet with lots of space for towels and a television set.

2. Next, you have to do your homework. Flip through design books or magazines and get inspiration from what you see. There are lots of design options out there, and you can get ideas from practically any bathroom design book.

3. The last thing to remember is, you don’t need to break the bank. Cabinets don’t need to be that expensive. You can look for cheaper alternatives by sourcing for materials that are not that expensive.

Shelves

Small bathroom makeovers that require new shelves are not something that will cost you a lot. Shelves give you additional storage space and won’t cost you a bundle.

Shelves are ideally placed beside cabinets where they can easily be reached. They are ideally made of wood or metal, whichever best complements your bathroom décor. Shop around for the best shelving materials and you can install them yourselves.

Need Professional Help?

Contact TalkLocal today and let us help you find the professional help that you need for a fantastic bathroom makeover!

Small Bathroom Makeovers: HVAC

Friday, September 27th, 2013

Small Bathroom Makeovers: HVAC - Heating and Cooling

Ceiling Fans and Vents

Installing ceiling fans and vents in your bathrooms, which you can include in your small bathroom makeovers, can be one of the most important things you can do. Not only will you prevent mold and mildew from forming in your bathroom, but you will breathe easier in your bathroom, too. You will also prevent stale odors and steamy mirrors while taking a shower.

1. First, find the right fan size to install in your bathroom. Fans are rated by a CFM (cubic feet per minute) rating, helping you determine the right size.

2. To find the CFM rating, multiply the square footage of your bathroom by 1.1.

3. Next, mark the space where you want the fan to be. Ideally, it should be between the shower and the toilet.

4. After that, you have to trace where the vent of your fan will come out. It should always come out to an outdoor outlet and not just to an attic.

5. Next, cut out the ceiling where you marked out the space you want the fan to be.

6. Outside, mark the space where the duct will be.

7. Run the duct from the bathroom to the outside and attach the fan. Or, you could opt for professional help.

Changing Radiators

In order to change radiators, you will need some carpentry tools. Of course, if you need to change radiators in your bathroom, the simplest thing to do is to find the same radiator. However, if you are unable to do so, here is how you can change a radiator.

1. You will need to adapt the pipework for a new radiator. First, you will need to disconnect the old radiator, complete with its pipe system from your wall.

2. At this point, all you need to do is to replace the heated towel rail, if you have one.

3. Then you will need to adapt the new radiator system to the old radiator system’s size. This means opening up the floorboards and altering the pipe system.

4. After this, you have to install the new heated towel rail.

Ask us for Help

Contact TalkLocal today and let us help you find a heating and cooling professional near you. We will connect you with up to three professionals in your area in just minutes, so you can get the help you need when you need it.

Remodeling to Add Space: Plumbing

Wednesday, September 18th, 2013

Remodeling to Add Space - Plumbers

Adding Water Lines

When remodeling to add space, it is important to consider the water lines that should be put into place. You may need to increase your water lines by ½ inch to ¾ inch. It is important to consider the source of the water and the plumbing. Is the plumbing intact? Make sure the faucets won’t leak.

Additionally, you must plan for the future. Sure, Roman tubs may look nice now, but as you age, will they still be convenient for you? You can’t just think of yourself now; you have to think of the future as well. The plumbing system in your new home has to fit directly with what you want or else you will be having to call the handyman twice a week, and that will be a bother to you and your family.

Adding a Bathroom

Adding a bathroom when remodeling to add space is another concern. There are plenty of things to consider here, and it must be well thought out.

> What kind of materials do you want to use?

> Do you want removable shower heads?

> Would you prefer bath tubs or just plain showers?

> Do you have a specific design for the sink in mind? Porcelain tiles are a huge favorite nowadays, so maybe you should consider that.

Again, there are many options out there, so do your shopping at your local home improvement store before deciding on your perfect bathroom so you won’t have any regrets. Bathrooms, after all, are sanctuaries for a lot of people nowadays. There is nothing wrong with crafting a perfect one for yourself and your family.

Need Help Deciding?

Give us a call today! TalkLocal will connect you directly with a professional near you who will assist you in all of your plumbing needs!

How To Reface Your Cabinets

Saturday, June 8th, 2013

How To Reface Your Cabinets - Handyman

If your cabinets are looking old and worn, but you are also on a tight budget, fight the urge to replace them. Learning how to reface your cabinets can have them looking new and allows you to update the look of your home.

Here is a quick crash course on how to reface your cabinets.

Disassemble all cabinet doors and drawers: This is somewhat of a painstaking process as you also must remove all of the hardware, like cabinet door hinges or drawer handles. Make sure you keep all components of your cabinet doors and drawers in order so that you know how to reassemble them easily.

Sand and fix any divots: Sand the cabinets to make sure the surface is smooth. If you encounter any gouges or divots, simply fill those in with wood putty.

Install wood veneer: Applying this thin coating of decorative wood can instantly transform the aesthetics of your cabinets. To do this, coat the area you are veneering with a light layer of wood glue. You can hold the veneers in place by using brads that are set in place with a nail gun. You can also purchase wood veneer tape to help speed up the process of veneering the edges of cabinet doors. Make sure all the veneer is trimmed accordingly and runs flush with the cabinets, doors, and drawers.

Applying stain: Once the veneer is in place, you can go to work staining your cabinets. You can use either an old rag or a brush for this job. Start staining in the tight, harder to reach places that require most precision. These will be harder to reach if you started staining the large areas first. Give all components of your cabinets significant time to dry.

Reassembling cabinets: After the cabinets are completely dry, you can reinstall the hardware and put the cabinets back together. This is where your method of sorting the disassembled cabinet parts comes in handy.

Finding A Local Resource

While it might seem like a quick and easy process, a lot of precision is required in learning how to reface your cabinets and make them look good. There are a number of professionals that are trained in this art and reface cabinets regularly. Now, with TalkLocal, they are easy to find. Just log on to our website and type in what you’re looking for. We will do the rest.