Archive for the ‘Computer Repair’ Category


Displayport Not Working Windows 7

Thursday, July 18th, 2013

Displayport Not Working Windows 7 - Computer Repair

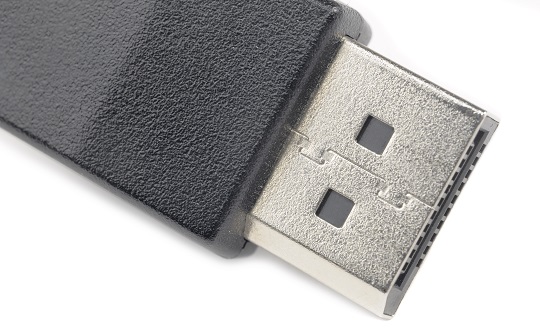
A displayport is an amazing tool to have when doing work, making presentations, and completing various other tasks on a computer.  But if there is an issue with the display, it is very frustrating and not really that helpful.  Upgrading your operating system will cause problems like this, but there is a solution that can get you back to work within minutes.

Why Is Displayport Not Working Windows 7?

Upgrading your operating system from Windows XP, Vista, or any previous version to Windows 7 will cause your displayport to malfunction. This is a common problem for Windows OS users, because the new system is missing some of the drivers that were always included in previous versions of Windows.

Possible Solutions

If your new computer system is missing these devices or drivers, go to your Device Manager and click on Details.  Under Properties, look to see if there is anything you can do.  If not, try going to the Microsoft site to download the drivers or reinstall the previous version of the operating system.

If the problem does not have to do with the missing drivers, it may be a graphics card issue. Your computer may be in energy saving mode, so the graphics card will disable the displayport.  You should switch to a high performance mode, and hopefully, your monitor will start to work.

Another solution to the malfunctioning displayport is to fix the DVI connection.  Sometimes the driver and monitor have different version numbers for the port, so you should use a DVI connector for the exact monitor you are using.  You will need to save an EDID profile, go into the display driver on the computer, and click on displayport.  You can then import the profile into the port’s settings.

Further Assistance

If you cannot seem to fix the problem, you should try to seek professional help.  Use TalkLocal to be connected with reliable, local computer technicians within minutes.  Simply tell us the problem you are having, along with your availability, and we will do the rest of the work. You will be speaking with the right professionals in just minutes.

Asus Netbook Monitor Problems

Wednesday, July 17th, 2013

Asus Netbook Monitor Problems - Computer Repair

Asus Netbooks are cheap, portable computers that are ready to go when you are. That makes it especially frustrating when you expect to get some work done between meetings or on a commute, and your netbook breaks. Asus netbook monitor problems can be frustrating, so here are some things you can do about it.

If the power light is on, but you are still faced with a black screen, try the following:

1. Take out the battery.

2. Unplug the AC adapter.

3. Hold the power button for 30 seconds. This should drain any electrical charges in the system.

4. Connect the netbook back to the power supply.

5. Power on the netbook.

If the screen is still black:

1. Try pressing both Fn and F2.

2. Connect your netbook to an external monitor. To toggle between screens, press both Fn and F10 (or just F6). If the external monitor works, then there is probably a problem with your netbook’s LCD.

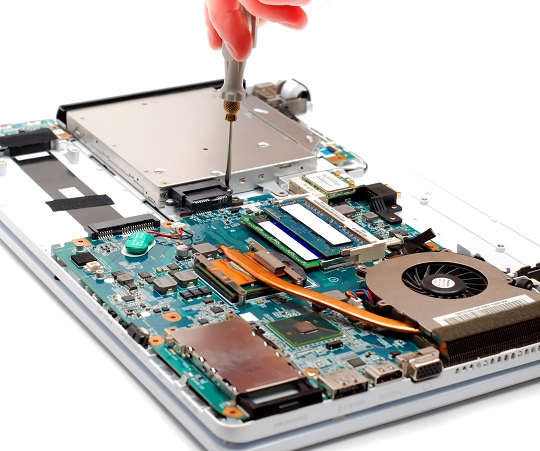
Luckily, you can replace your LCD screen at home. You just need to use a Phillips-head screwdriver.

Follow these steps:

1. Turn off your netbook.

2. Unplug it from any power source.

3. Press the small tabs on the top of the keyboard while lifting it. You should see a metal plate.

4. Slide the plastic cable connector forward to disconnect the metal plate from to the keyboard.

5. Remove the screws on the metal plate.

6. Do the same for the bottom of the netbook (two are found on the front side).

7. Lift the corners of the notebook to remove the plastic housing from the bottom. You should see the motherboard.

8. You should see white plastic plugs on the bottom-center and top-left of the motherboard. Unsnap them to disconnect the five wires.

9. Remove the top screws from the LCD screen.

10. Remove the bottom screws.

11. Separate the two parts of the screen using a thin tool.

12. Remove the screen from the body of the computer.

13. Install the new screen.

14. Reassemble the netbook, tracing back from last step.

Find A Professional

Is computer repair not your forte? Don’t worry; TalkLocal has you covered. Just give us a call to find local service providers to fix your netbook for you. You will be connected with the right professional within minutes.

How To Upgrade the RAM On A Macbook Air

Tuesday, July 16th, 2013

How To Upgrade the RAM On A Macbook Air - Computer Repair

The RAM on any computer is an important part of your electronic device.  RAM stands for Random Access Memory. It is a form of data storage that allows the information to be accessed in any order.  There are two different types of RAM: static and dynamic.  Both of these data storage types are useful and easy to access.  You should make sure you have the amount of RAM you need when you are buying your computer, because sometimes the option to upgrade it is not a possibility.

How To Upgrade the RAM In A Macbook Air

The Macbook Air has been around since 2008, and since that time the RAM has never been upgradable.  In the product description given by Apple, it is described as “configurable” which many people confuse as thinking that it means it can be upgraded.  Sadly, this is not the case.  The RAM on a Macbook Air is smoldered to the motherboard to save space in this dynamic computer.

Some people turn to the option of taking their computer to a computer store or somewhere that specializes in technology.  This is a risky move.  Best Buy is known for saying that they can help upgrade the RAM at the store if the customer would like them to.  This is strange because it really isn’t possible.  Doing so is also a bad option because it will void your warranty with the Apple store.

There are multiple online blog threads discussing this conundrum because it seems so unreasonable.  User upgrades are not possible, and there are not many alternatives if you find yourself in a situation with not enough RAM.

When buying a Macbook Air, consider what you will be using your computer for.  Always overestimate rather than underestimate how much RAM you will need, because otherwise, you will find yourself strapped for data storage space.  The difference between a 2 GB, 4 GB, and 8 GB RAM is only a couple hundred dollars, so it may be worth it to pay for more space initially than to have to buy a new computer in the long run.

Continuing Problems

If you have more questions about how to upgrade the RAM on your computer, speak with a professional so that you can get the best help possible. TalkLocal will connect you with up to three, high-quality professionals in your area in just minutes.

Burning Smell From Computer

Monday, July 15th, 2013

Burning Smell From Computer - Computer Repair

Overheating is a pretty common problem with computers. This is most likely what is causing the burning smell emanating from your PC. It can cause permanent technical failures if left untreated. This problem can be avoided by performing regular maintenance on your computer. However, if your computer does have a burning smell coming from it, it is important to turn off the computer immediately to prevent more damage from happening.

What Causes Burning Smell From Computer?

Dust

During normal operation, the fans inside the PC power supply and case form a circulatory system, which draws air in through the vents to cool down the system. This works well for cooling, but a negative side effect is that dust and other air particles are sucked into the computer. Inside, dust is trapped and settles, which can stop the cooling effect and cause things to heat up, causing the burning smell.

Fan Failure

It is common knowledge that parts inside the computer reach high temperatures during operation, which is why it is essential that the internal fans cool the systems down and stop them from burning out. If the CPU fan fails, the operating system will increase in temperature and overheat.

Blocked Vents

When a computer has been running for a while in a dirty environment, it is possible for the air vents inside the case to become clogged with dirt, dust, and other harmful particles. This prevents fresh air from coming into the case, which will cause it to heat up. Many higher-end cases put filters over the air vents, which are hidden for aesthetic purposes. Many people do not know that they should regularly clean these air vents.

Faulty Components

Faulty components may cause a burning smell when they fail, depending on how bad the failure is. In the worst-case scenario, these components can short out, which draws large amounts of current and causes them to heat up immensely, causing complete system failure.

Need Computer Help?

If a burning smell continuously comes from your computer, you may want to seek professional help. Use TalkLocal to get the best help you can get from local IT service professionals to find the cause of the problem and fix it before your PC fails completely. We will connect you with the right professionals in just minutes.
Troubleshooting An Unrecognized Wireless Mouse

Saturday, July 13th, 2013

Troubleshooting An Unrecognized Wireless Mouse - Computer Repair

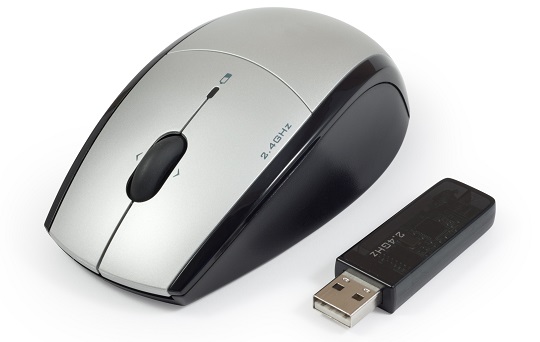
Nothing can be more frustrating than dealing with a wireless mouse that just doesn’t seem to work. Before you throw the mouse across the room, try these methods to get everything back in working order. Here are some tips for troubleshooting an unrecognized wireless mouse.

Try A Different Port Or Environment

Try to connect the receiver to a different USB port to test for any problems with the original port. Also, try to connect the receiver to a USB port located on the back of the computer, because these usually have more bandwidth power available. Be aware that items such as desktop fans, metal furniture, and fluorescent lights may interfere with the signal from the pointing device. Try moving to a different location to test your wireless mouse.

Replace The Batteries

This issue may occur if the battery power is low. Experts recommend using batteries that are designed for use with electronic equipment.  Replace the batteries to determine if this solves the problem. Make sure you resync your mouse after replacing the batteries.

Test The Device On A Different Computer

If the issue continues to occur, test the mouse on a different computer. If the problem persists when connected to a different computer, you may have a defective mouse.

Uninstall Any Conflicting Mouse Software

If you have any other mouse software installed, such as Logitech or touchpad software, it may interfere with your wireless device software. Uninstall any interfering software to see if this solves your problem.

Still Need Help?

If you are still having problems troubleshooting an unrecognized wireless mouse, you may be wondering if you should buy a new one. Before you rush out to the store, try speaking with a computer repair technician. They will be able to tell you whether you actually need a new mouse or not. TalkLocal will connect you with up to three computer technicians in your area in just minutes. Try it for free!

Raid Configuration Error

Friday, July 12th, 2013

Raid Configuration Error - Computer Repair

RAID is a redundant array of independent disks that’s main function is storage.  It combines a various array of disk drive parts into one device.  The data from your computer is distributed among the various levels depending on their importance.  This device plays an important role in data storage for your computer, so it can be a big problem when it stops working properly.  If you have a raid configuration error you should definitely look into the issue immediately. Here are some ways to resolve a raid configuration error.

Delete and Reinstall Programs

Your first option in fixing a RAID configuration error is to delete and reinstall the programs.

1. You will need to delete all of the RAID sets and shutdown your computer.

2. You can then move the cables to slots that show failed drives.

3. When you reboot, login into Areca Bios once again.

4. From this area, create Raidset to ensure that all channels are available.

If your problem persists shutdown the system and repeat this process once more.  If the same slots show failed drives, then the problem is either with the cable or back plane.  You can look into these from there.

GPT Protective Partitions

Another way you can go about solving this RAID configuration error is to consider the GPT protective Partitions.

1. Once you connect the drive to a PC using either internal or external connections, go to My Computer and then to the Managing tab.

2. In Managing there should be Disk Management, which you should verify is the GPT protective partitions.

3. Once you see them you should delete them.

If you are running on Windows disk management you cannot do this by simply hitting delete or moving them to the trash.  You should look up more in depth instructions on how to move forward in your manual.

Find Computer Help

If neither of these options work to help you fix your RAID configuration error you may need to seek professional help.  Use TalkLocal to be put in contact with a reliable, locally based IT service company.  You don’t have to do any work! Simply input the problem you are having, along with your availability, and within minutes you will be connected with someone who can help you out.  Leave the stress and time consuming calls in the past. The time is now for a more advanced service search where you barely lift a finger!

Reinstalled OS System and Lost Data

Tuesday, July 9th, 2013

Reinstalled OS System and Lost Data - Computer Repair

If you reinstalled OS system and lost data, don’t worry because most of the time this won’t lead to permanent data loss. Your data can still be recovered using Data Recovery Software. Should you choose to recover your data, stop using the drive and do not save any data to the disk, as this could cause overwriting and permanent loss of your data.

Why Was Your Data Lost After OS Reinstall?

When you reinstall the OS over the existing installation, the following happens:

– The original system files are copied to the hard drive.

– Certain windows settings are reset to default values.

Normally when you reinstall the OS, the ‘Documents and Settings’ folder will be reinitialized, and all files in that folder will be deleted. However, these deleted files are recoverable if you don’t overwrite them. When you overwrite data, you replace previously stored data in a disk with new data. Recovering data is easier for smaller, less fragmented files and data on larger disks.

Re-Installing the OS Is Necessary When…

– A file that is required to run for the system to work gets either deleted or corrupted

– A program that runs at startup causes an error that results in a computer crash

– The registry has been corrupted

– Hardware failure during startup causes the system to crash

How Do you Recover Lost Data After OS Reinstall?

Try using a FAT Recovery or NTFS Recovery from the Disk Doctors Windows Data Recovery category to recover your files quickly in case of formatting, reinstalling your OS, repartitioning, or any other data loss disasters. These programs should get your data back without overwriting your system.

Need Computer Help?

If you still cannot recover your data after trying all these things, then you should use TalkLocal to get the best help you can get quickly from local IT service professionals.

Touchpad Suddenly Stopped Working

Monday, July 8th, 2013

Touchpad Suddenly Stopped Working - Computer Repair

It’s infuriating when it happens. You were happily clicking away until the laptop touchpad suddenly stopped working. You didn’t have a mouse and you were ready to call a computer technician. Don’t pick up that phone just yet. Usually, a faulty touchpad can be fixed with some simple troubleshooting.

My Touchpad Suddenly Stopped Working!

1.      Clean your touchpad using rubbing alcohol and a simple cloth.  Shut down the computer before cleaning, and then gently wipe your touchpad with the rag and alcohol, but be careful not to soak your laptop. Do not poor the rubbing alcohol directly on your computer.

2.       Remove any foreign objects around or between the buttons on your keyboard and touchpad with a pointed item. Dust and debris can prevent your keys from working properly.

3.       Turn on the computer.

4.    Enable the touchpad using one of the function keys (this is different for each computer).

5.       If that does not work, Go to Start > Right click on Computer.

6.       Select Properties > Device Manger.

7.       Select Synaptic touchpad under Mice and Other Pointing Device.

9.       Select the Driver tab > Properties box.

10.   Click on Update Driver.

11.   Restart your computer. If the problem has not been fixed, uninstall and reinstall your drivers. To uninstall your drivers, follow steps 4-7 and choose Uninstall from the Driver tab.  Then reinstall by repeating steps 4-9.

12.   Update the OS systems and BIOS on your computer.

Need Computer Help?

If these troubleshooting instructions do not work, you may want to find a computer professional. TalkLocal can connect you with the best computer repair professionals in your area. Just tell us what you need, where you are, and when you’re available, and we’ll find the right professionals for you, in just minutes!

Macbook Pro Power Adapter Very Hot

Sunday, June 30th, 2013

Macbook Pro Power Adapter Very Hot - Computer Repair

It is normal for a laptop to grow somewhat hot when charging, so do not be alarmed if your Macbook power adapter is simply warm. However, it should not be too hot to touch. Is your Macbook Pro power adapter very hot? Read this article to find out what you can do about it.

What To Do If Your Power Adapter Is Too Hot

1. If you touch your power adapter and find that it is painful to touch it, it is too hot. Unplug the power adapter from your Macbook immediately and allow it to cool down before charging your laptop again, as overheating may damage your Macbook.

2. You should also try to lower your computer’s memory usage until it cools down by closing out of applications and windows. You can press Command + Option + Escape to force quit out of applications that are not responding.

3. If your computer is still running extremely slow or feels extremely hot to the touch you should put it to sleep, restart, or shut it down for a while until it cools down.

Why Macbook Pro Chargers Grow Very Hot

The brick part of your Macbook Pro power adapter needs ventilation in order to stay at a safe temperature. Do not place it under a blanket or cushion. You should also make sure that it is placed on a flat open surface; do not sit it on your lap or on a bed.

If Your Macbook Pro Charger Is Still Too Hot…

If you are properly ventilating your power adapter, but it is still growing too hot to touch, you may need to do a System Management Controller (SMC) reset.

1. Shut down your computer.

2. Unplug your power adapter from your computer, if it’s still connected.

3. Remove the battery.

4. Press and hold the power button for 5 seconds, then release the power button.

5. Reconnect the battery and charger.

6. Press the power button to turn on the computer.

Get Professional Help

If your Macbook Pro power adapter is still too hot after an SMC reset, you may need the help of a computer repair professional. With the help of TalkLocal, you will be connected with high-quality professionals in your area that are available when you need them, within minutes.​

Taskbar In Windows Disappeared

Wednesday, June 26th, 2013

Taskbar In Windows Disappeared - Computer Repair

If your taskbar in Windows disappeared, first check to see that you haven’t accidentally put the screen in the full screen mode by pressing the F11 key. A disappearing taskbar can either be attributed to unintended key strokes and mouse movements or a crashed processing system. Here is how you can fix it.

When Unintended Key Strokes Or Mouse Movements Cause the Problem

Unintended mouse movements may have dragged the taskbar to be minimized, thus causing it to disappear in the desktop. Follow these steps to check if this is the problem.

1. Look for a thin line on the one of the four edges of your computer screen.

2. Click on the thin line. The hidden taskbar should open up.

3. Right click on the taskbar that opens up, and then select “Properties”.

4. Uncheck the “Auto-Hide” option inside the taskbar menu interface.

5. Click OK.

You can restore the minimized programs by pressing the ALT and TAB keys while selecting the desktop. You can also access the taskbar properties interface while not clicking on the taskbar, too. For this, do the following:

1. Access the Control Panel (Press the Window Button on your Keyboard + C).

2. Select the “Taskbar and Start Menu” option.

Processing System (explorer.exe) May Have Crashed

explorer.exe is the name of the process which operates the desktop. Under excessive CPU conditions, this process can crash, and the taskbar, which is a part of explorer.exe, will disappear from your desktop. If your desktop seems strangely empty or icons listed on it are unresponsive, then explorer.exe likely crashed.

To restart the process system follow these steps.

1. Press CTRL + ALT + DEL together.

2. Access the Task manager.

3. Click the “File” button.

4. Click “New Task (Run)” button.

5. In the Text Box that appears, enter “explorer.exe” and press OK. This should resume the explorer.exe process and restore your taskbar.

Need Computer Help?

A crashed process system (explorer.exe) may be caused by bad hardware or further complications in your computer system. At this point it is recommended that you call for help from the local experts. TalkLocal will connect you directly with a local expert to fix your issue quickly. Best of all, our service is completely free to you.