Posts Tagged ‘DIY’


Do-It-Yourself Shave Horse Plans

Friday, March 14th, 2014

Do-It-Yourself Shave Horse Plans - Handyman

If you’re interested in woodcraft or working with green wood for your wood projects, then you may want to have your own shave horse. Just like how any good carpenter requires the right set of carpentry tools, a woodworker also needs certain tools such as a shave horse to create a range of projects. It’s a brilliant tool that has been used by woodworkers even before the dark ages until now. Why not try your do-it-yourself skills by taking on shave horse plans and build this tool yourself?

Why “shave horse”?

It’s called such because one has to mount it like a horse in order to operate it, and it’s used traditionally with a shaving tool known as a drawknife to turn a piece of wood into the desired shape with the right thickness.

What does it do?

The main job of a shave horse is to grip a round piece of wood so it can be worked on. Its ability to clamp on wood is powered by the user’s legs. Pushing on a foot bar at the underside of the horse makes it hold the wood positioned on the work area. Releasing the foot bar releases the wood as well.

What does it look like?

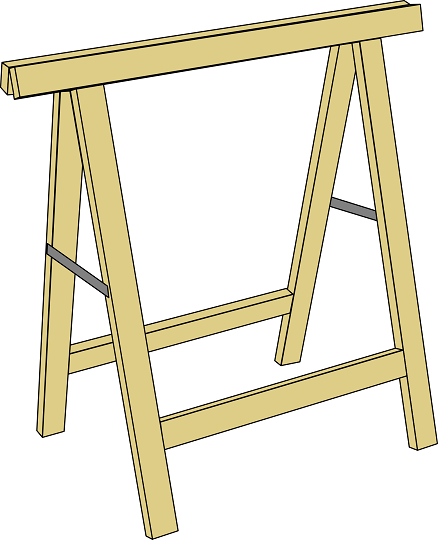
There are a number of shave horse plans with slightly different styles and variations. However, the basic design consists of a bench with legs (three-legged horses are more stable) that function as the base frame and seat for the horse. The other basic components are the foot bar, treadle frame, yoke and, of course, the hinged work area where the piece of wood is placed.

Need Carpentry Help?

Shave horses are easy to make if you already have some experience with woodwork. However, if you’re just starting out in this wonderful hobby, you may not have the skills yet to follow DIY shave horse plans. This shouldn’t stop you from owning one, though. Seva Call can help you find an experienced professional who can take your shave horse plans and build this tool for you just as you want it. Contact us now to start your search.

How to Get Smoke Out of Clothes

Monday, October 28th, 2013

How to Get Smoke Out of Clothes - Tailors

It’s an annoying fact that sometimes the smell of cigarette smoke gets into our clothes. There are some ways to get smoke out of clothes. The smell of smoke on clothes is not only unpleasant to us, but also to those we come into contact with. Thus, getting the smell of smoke out of clothes is very important. Some clothing materials make it harder to get rid of smoky smells, such as wool sweaters.

Avoidance

Prevention is better than cure, so rather than having  to get smoke out of clothes, avoid places where there is cigarette smoke. However, this strategy is not effective all the time. Thankfully, if you are wearing cold resistant clothing, these types of clothes are more resistant to the smell of smoke. If you are a smoker yourself, or live with one, take some measures to reduce the cigarette smoke odor in your home. This helps to avoid your clothes smelling smoky in the first place.

Spray Often

If you have cologne or air freshener on hand, spray often when in the presence of smoke. This will get smoke out of clothes manufactured in cotton or linen. It will also help decrease the smell once you are away from its source.

Wash

1. Place your clothes in the washing machine and set the temperature to the hottest that the clothing manufacturer allows.

2. Add a cup of baking soda and one cup of white vinegar.

3. Soak your clothing for at least an hour.

4. Then, add detergent and wash your clothes as usual. There is no need to drain out the original water that you used to soak your clothes in.

5. However, if your clothes are not washable, you can hang them outside to try and disperse the smell. Or, you can take them to a professional cleaner instead.

Need Help Getting the Smell of Smoke Out?

Contact TalkLocal today, and we can help you find a professional cleaner who will remove the smell of smoke from your clothes in no time!

Do It Yourself Skylight Install

Wednesday, July 17th, 2013

Do It Yourself Skylight Install - Window Replacement

Installing a skylight in your home can brighten your space on a daily basis. This is an improvement to your home that can add value as well as aesthetic appeal to your property. By following this do it yourself skylight install guide, you may be able to install a skylight in your home on your own.

Do It Yourself Skylight Install

1. First, you will need to determine the location in your home where you want to place the skylight. Common areas for a skylight install include the kitchen, bathroom, and family room.

2. Next, you will need to determine if you want to install a curb-mounted skylight or a frame-in-place model. A frame-in-place model is installed using L-shaped brackets while a curb-mounted model is mounted in an elevated position over the frame of the roof.

3. After selecting the right window for your needs, consider the placement of the skylight and of the light shaft carefully. Ideally, you will choose a location for the light shaft that falls between the ceiling joists and that does not require the joists to be cut. These windows are designed to minimize the need for cutting into joists, so a simple adjustment in the placement of the window may eliminate the need to cut into the joists. Framing the light shaft and window will require more effort if you do cut a ceiling joist. Keep in mind that the light shaft can be angled or vertical depending on the style that is suitable for your home.

4. The appropriate skylight framing assembly for the type of window that you have selected will need to be installed into your roof, and the light shaft will need to be framed with lumber.

5. To finalize the installation, the window will need to be carefully installed into the framing and sealed, and drywall will need to be installed in the light shaft.

Or Just Have A Professional Handle It

While you can enjoy considerable benefits from your new skylight, including improved ambiance and added value to your home, this is typically a project that you want to leave to a professional. If you would like to learn more about how a professional can install a skylight in one or more rooms in your home, just use TalkLocal. We will connect you with the right professional in just minutes.

To DIY Or Not to DIY: How-To Link Roundup

Sunday, July 14th, 2013

Written by Dallea Caldwell

There are a number of dubious television shows targeting impressionable adults, pressuring them to do it themselves. No longer is parental permission and supervision advised, not even for activities involving sharp objects or choking hazards (or what toddlers like to call bite-sized), or when operating heavy machinery — their oversized peanut heads before they grow into them, for example. For years, an audience who – for social responsibility’s sake – were told “don’t try this at home,” are now being indoctrinated into a trendy self-reliance that beckons them to the unknown dangers of D.I.Y.

It is up to responsible of adults to determine whether a task is doable, too daunting, or too dangerous to “D.I.” without a trained professional. One must research to learn the requirements of the project and be capable of an honest self-assessment. Otherwise, a project can go from home addition to hospital admission. (more…)