Archive for the ‘Handyman’ Category


When Porch Columns Are Warped

Thursday, January 9th, 2014

When Porch Columns are Warped - Landscapers

Many people consider wood to be one of the most beautiful and versatile options for porches. However, it requires more time and attention to maintain than other materials to keep it in good condition. Without proper maintenance, wood can rot, become stained, crack, or warp.

Warping is not just unsightly; it can be unsafe, too. Warped floorboards create an uneven walking surface, which makes nasty falls very likely. When porch columns are warped, the structure they support is in danger of collapsing onto the porch. So it may be best to replace the warped posts.

What Causes Wood to Warp?

Moisture and heat are the two factors that bring about warping in wood. First of all, the general facts are that wood absorbs moisture and that it will dry out when the weather is hot.

Remember that timber is made up of long fibers that allow water to move through the tree. When timber is newly cut, it still holds a lot of moisture. In order to use timber, it needs to dry first. With the high demand for wood, however, some timber products are not dried properly, so they are not very stable.

As wood dries out, it will often bend and warp. It could be that your porch columns are warped towards the direction where they are more exposed to the sun and have already dried out on that side more than on the other side.

Prevent Your Porch Columns from Warping

To keep your wood porch columnss from warping, they must be sealed periodically. In general, it is recommended by experts that a wood porch be sealed every few years so that water will not re-enter. This will keep the wood’s natural oils replenished. Use a paintbrush to apply penetrating sealer to the wood every couple of years.

It’s also better to purchase high-quality timber from a commercial supplier, and make sure to buy wood that has been kiln-dried after being treated (labeled KDAT),so the chances of warping can also be minimized.

Need Help Fixing a Warped Porch Column?

Whether one or all of your porch columns are warped, a reputable handyman will know how to turn your porch around so it’s not only beautiful and inviting, but safe, too. Seva Call can connect you to qualified local service professionals in just a few minutes. Try our free service, and have your porch problems straightened out quickly.

Steps to Refurbishing Wood Floors

Monday, January 6th, 2014

Steps to Refurbishing Wood Floors - Handyman

Occasionally, old wooden floors require maintenance to stay looking good, stain-free and protected against wear. Wood floors that have been coated with varnish, lacquer, or shellac will need to be refinished entirely if there are areas where the finish has faded completely.

A complete refurbishing job requires sanding and refinishing of the whole floor. If the floors are still in relatively good condition and just a little worn in some areas, simply re-coat the worn sections with the appropriate sealer, clean, and polish the floor well.

If refurbishing wood floors completely, follow these steps:

Step 1: Remove debris from the entire floor surface by vacuuming.

Step 2: Floors with worn finish need to be sanded either by hand or using an electric sander.

First, use 60-grit sandpaper to remove the old coat and even out any scratches on the floor. Next, use a finer grit sandpaper (120-grit) to re-sand the floor.

For softwood flooring, use sandpaper with even finer coarse, such as 150-grit sandpaper.

Step 3: Vacuum the floor to remove all the dust from sanding. Afterwards, use a cloth to wipe the floor to make sure all particles are removed.

Step 4: If you have bare wooden floors with dark stains, you can apply bleach to the stains to get rid of them. Make sure the bleach does not get into the glued seams.

Rinse off the bleach once the stains have lightened. Never use bleach on your wood floors if any type of finish has been applied on them, because the finish will certainly be damaged.

Step 5: Prepare to apply sealer to the floor. First, protect the baseboards from the sealer by taping their bottom parts along the floor’s edges.

Proceed with painting the floor. To touch up a slightly worn wood floor with penetrating sealer, apply a thin layer of the sealer over the worn out areas. Instead of the typical method of using a paintbrush, rub the sealer on the floor using a soft cloth. Other than this, follow the directions for use on the product container.

When refurbishing wood floors completely, the entire surface should be resealed by applying an even coat of surface finish or penetrating sealer to the whole floor.

Step 6: When the first coat of sealer has completely dried, apply a second layer. While this step is optional, it is recommended, because it makes the pigmented sealer appear darker and offers a thicker protective layer to the surface finish.

Step 7: Peel off the tape from your baseboards.

Need the Help of a Handyman?

When refurbishing wood floors is more than you can handle, call in a reliable handyman. Use Seva Call to speak with the right person to do the job. Our service is quick and free. Try us today!

Handyman Certifications

Friday, January 3rd, 2014

Handyman Certifications - Handyman

When you need professional help to conduct important home improvement projects, it is advisable to hire competent, licensed, certified, and fully-trained specialists who live and work in your area.

This way, you’ll be able to prevent costly scams and unpleasant surprises and obtain excellent results on time and on a budget. Here are a few basic things that you should know about handyman certifications.

License Requirements

The fact that you have basic handyman skills doesn’t actually turn you into a respectable professional. To get many clients and make a name for yourself as a handyman, you have to graduate a technical school, pass training courses, and take pride in years of hands-on experience. Note that license requirements for handymen contractors vary a great deal by state.

Reasons Why It’s Important to Hire ACHP Members

Experienced handymen can complete a variety of assignments, with different levels of complexity. From timely solutions to painting, plumbing, heating, and cooling problems to home inspections, architectural services, and expert guidance around the clock, the real pros in this line of business offer you the assistance you may need to turn your home and/or business into a truly comfortable environment.

The Association of Certified Handyman Professionals (ACHP) based in Florida gathers respectable, knowledgeable handymen who provide premium, decently-priced services.

ACHP makes it easy for people to locate a trustworthy handyman and offers them all the references they may require to make an informed decision. Handyman who have the ACHP certification are licensed, trained, and eager to respond to your emergency calls at any given point in time.

Opt for UHA-Certified Companies

Always choose to collaborate with businesses certified by the United Handyman Association (UHA). They provide more than satisfactory services and offer you a much-appreciated fraud protection guarantee.

Ask an Expert

Want to find out more about handyman certifications? In this case, meet the most competent handymen in your area and get the most accurate answers to all your questions. Use TalkLocal, a free concierge service that connects you with gifted professionals who operate in your area.

How to Use Wood Filler Products

Wednesday, January 1st, 2014

How to Use Wood Filler Products - Handyman

Wood filler products have many uses to repair wooden surfaces and objects. There are water-based wood fillers, which can be diluted with water, and thicker solvent-based products, which are typically used to patch up cracks and holes.

It is important to choose the product with the consistency that is appropriate to the job. Wood fillers dry to a hard finish so they can be sanded or drilled. They can also be painted over or coated with varnish, which is necessary for exterior applications.

Here are some ways to use wood filler products.

Fill Up Holes

If you have a wooden floor, fixture, or any wooden item that has a hole or crack, you can use a thick wood filler to fill up the openings. However, you can’t just jam the filler inside the crack without any prep work.

1. First, smooth out the inside surface of the crack using sandpaper and vacuum all the sawdust afterwards.

2. Then, push the wood filler in using a putty knife. Use the knife to smooth out the top.

3. Let the filler dry and then sand the area to get an even surface.

Fix Spots on Furniture and Flooring

Combine thin and thick wood filler products to fix spots on the surfaces of your wooden furniture, except on load-bearing parts like the legs of tables or chairs that will require a stronger compound, such as a wood hardener to reinforce the wood and ensure a solid base.

1. For spots on wooden floors, wood filler products with thinner consistency are normally used.

2. Spread the filler evenly.

3. Leave it to dry completely before staining.

Even Out Wood Grain

Wood filler products are also used as wood grain fillers. If you’re starting a wood project, one of the first things to do prior to painting or staining the wood for the first time is to smooth out the wood grain.

Certain woods like oak, walnut, and mahogany have large pores that absorb too much stain, so applying a coat of wood filler onto the surface will make it nice and smooth to be painted or stained.

1. Use a large trowel or putty knife to apply a thin coat of wood filler onto the surface of the wood you’ll be working on.

2. Allow the filler to dry thoroughly before sanding down the surface to smooth it.

3. Afterwards, the wood will be ready for you to paint or stain.

Need a Pro for a Wood Project?                      

If you have a job or project that needs professional handyman skills or you simply don’t have the time to do the work yourself, you can count on TalkLocal to find a qualified contractor to help you. Try our free service, and find the right professionals right now.

How to Install Mailbox Metal Post

Friday, December 27th, 2013

How to Install Mailbox Metal Post - Handyman

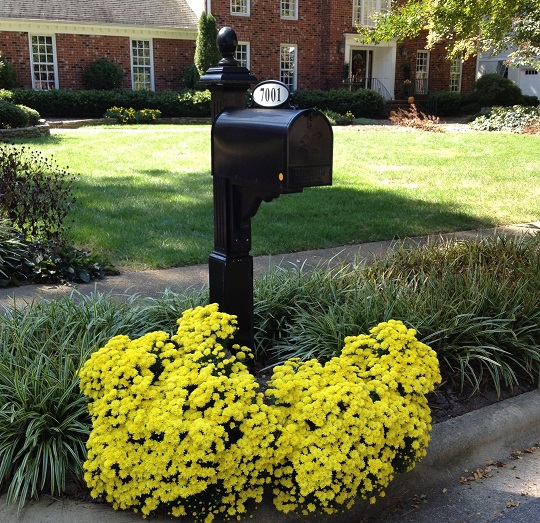
A mailbox metal post is a superior alternative to a wooden post. It will last longer than a wooden post and has a neutral effect on your home’s curb appeal. A metal post is also completely recyclable.

If you’re constructing your own metal post for your mailbox, use the proper tools to ensure the finished product will be stable and sturdy. Also, make sure to check local mailbox regulations for post diameter and mounting height before you begin the construction. Once you have a metal pipe ready, follow the instructions below to install mailbox metal post.

Measure and Cut

1. Take a metal pipe two inches in diameter. Use a tape measure and soapstone to mark the pipe where you need to cut it along its length to allow for the standard mailbox height of 45 inches above ground, plus 30 inches more to extend underground.

2. Place the marked metal pipe down on a steady surface, preferably using clamps. Use a portable band saw to cut the pipe right along where you marked it with the soapstone. Once you’ve cut the metal pipe to length, proceed to install mailbox metal post.

Dig and Fill

3. Locate the area where to put the mailbox post. Check with your local post office for the proper placement regulations before you dig. Make sure you’re wearing gloves and protective eyewear during installation.

4. Use a post-hole digger or clamshell digger to dig a hole with an 8-inch diameter and a minimum depth of two feet.

5. Pour water up to a third of the post hole. Put the post in the hole. Fill the hole with dry concrete mix. You will need about 50 pounds of dry concrete. Add a little more water on top of the concrete.

6. Use a level tool to plumb the post. Secure the post in place while the concrete dries by packing topsoil around the post. Wait until the concrete completely dries (6-24 hours) before mounting the mailbox.

Attaching the Mailbox

7. Place the mailbox above the metal plate of the post. You will find the bottom of the mailbox has mounting holes. Use the soapstone to transfer these holes to the metal plate. Put the mailbox aside.

8. Using a drill bit attached to a 3/8-inch drill, create holes through each of the marked holes. Then, screw your mailbox into place through these mounting holes.

Get Professional Help

Getting help from a professional handyman is the easiest way to install a mailbox metal post, especially for those who are not into DIY projects. TalkLocal can help match you with up to three qualified handymen within your area. Let us connect you with the right pros now!

Fence Repair Cost

Wednesday, December 25th, 2013

Fence Repair Cost - Handyman

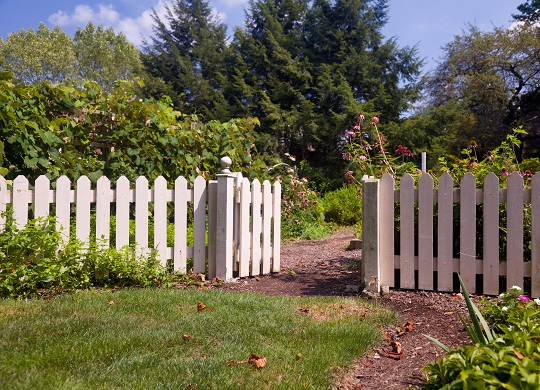
If your fence is severely damaged, you should fix it as soon as possible to avoid safety risks and to boost the curb appeal of your property. After all, who would want to live in house surrounded by an ugly, broken, rotten fence?

If you’re trying to determine the average fence repair cost, you should know that most homeowners invest anywhere from $475 to $675 in this type of project; those who won’t settle for less than first-class professional services and premium materials might take up to $1,100 out of their pockets, while the minimum cost is estimated at approximately $175.

Keep in mind that the fence repair cost will always be influenced by numerous factors, including the following.

1) Fencing Materials

Different construction materials carry different price tags. Those who have designed and installed sophisticated, luxurious fences to protect their property will now have to come up with a significant amount of money to repair it and make it look like new.

For instance, if you have a vinyl fence, you will invest less in this repair project; at the same time, fixing a thick brick wall built around your home will cost you a lot more. Moreover, a repair project usually involves many additional materials, like paint, new locks, anti-corrosion products and so on, which obviously drive up the fence repair cost.

2) Level of Damage

Do you need to pay for a quick fix or for much more laborious repairs? If you only need to replace one or two damaged fence posts, this should be considered a simple repair that shouldn’t cost a fortune.

On the other hand, if you own a very tall, long fence that has been severely deteriorated by a storm or by a vehicle, a repair project might not be your most cost-efficient alternative. In this case, it is advisable to purchase and install a new, solid substitute.

3) Labor

Are you asking for a simple, rapid fix, or does your project involve more than a couple of hours of hard work? Do you plan to conduct a DIY project or would you be willing to hire a carpenter or a skilled handyman?

You should know that most professionals operating in this sector charge by the hour. If you want to determine the fence repair cost, start by calling a few candidates for this assignment and ask for an up-front estimate.

Ask an Expert

It might be difficult for you to repair your fence by yourself, especially if you don’t have any experience and zero skills when it comes to basic home improvement projects. Take this weight off your shoulders and opt for first-class services ensured by competent handymen.

Identify the best ones by relying on TalkLocal, a great, free service enabling you to get connected with the right professionals in your area in just minutes.

How to Install Mailbox Wooden Post

Monday, December 23rd, 2013

How to Install Mailbox Wooden Post - Handyman

If you need to install a mailbox wooden post in your home, you can easily complete the job if you have one afternoon free, especially if you’ll be using quick-drying cement. Pre-built mailbox posts are widely available at home improvement stores, or you can use treated wood for the post. Treated wood makes great mailbox posts because it’s resistant to mildew and insects.

– Mailbox and mailbox post

– 2 x 4 boards

– Water

– Quick-drying concrete

– Galvanized screws

Along with the materials above, you will also need a post-hole digger, a laser level, and a screwdriver to do this job. Now, here are the simple steps to install a mailbox wooden post:

Follow the specifications given by your local post office in determining the proper location for the mailbox post. Make sure to find out what the mailbox regulations are in your city before installing the post. According to federal regulations, a mailbox post must be 42 inches high from the ground to your mailbox’s base. However, see if your local ordinances specify a different height.

If digging at the old mailbox location, you may have to remove the old post’s cement base first.

Then, dig out a new hole with a post-hole digger. Remember, standard postal service regulations state that the height of a mailbox from its base to street level should not be more than 45 inches.

After digging the hole, put in the post. Level the post and keep it standing straight up by supporting the center with one beam attached to one side and another beam attached to its back. Make sure to secure the supporting beams in place, because their job is to hold the mailbox post in a level position while the concrete is being poured and setting to dry.

Typically, a 50-pound bag of concrete (quick drying) would be enough for this job. For this amount of concrete, you will need roughly one gallon of water. Fill the hole with the dry concrete, making sure to leave some space about 4 inches from the top. Then, pour water over the concrete to saturate.

Leave as is with the supporting beams in place for up to 6 hours, or until the concrete has completely dried.

Screw the wood anchor to the mailbox post to attach the mailbox. Slide the box over the anchor and tighten the screws to secure.

Need Help to Install a Mailbox Wooden Post?

If you’d rather let a professional handyman to do this job, use TalkLocal‘s free, innovative service to match you with the right pros. Tell us what you need now!

Replacing a Loose Mailbox Post

Wednesday, December 18th, 2013

Replacing a Loose Mailbox Post - Handyman

Is it time to replace your mailbox post? If it has given you about a decade of service before needing repair or replacement, you’re quite lucky. Mailbox posts are typically made of pressure treated wood, metal, or plastic pipe. In any case, the mailbox post is normally installed in the ground and cemented in place with the mailbox fastened to the post.

Regardless of what type of mailbox post you use, it will need replacement or repair sooner or later. If the post doesn’t get knocked down by a snow plow or get damaged by vandals, extreme weather will take its toll on the post eventually.

You might also find yourself with a broken or loose mailbox post one day should a car accidentally side swipe your mailbox, which is a fairly common occurrence.

When you have a wobbly mailbox post, whether due to an accident or a weakened material, it is best to go for a replacement.

Remove the Old Post

Perhaps the most difficult part of replacing a loose mailbox post is removing the old one. If the old post is not yet loose enough, wiggle it a little to allow the ball of cement underneath to come loose from the earth. You may need to dig around the post to remove some of the earth. Pry the post from the ground using a mason’s bar or pry bar.

Install the New Post

1. Once you’ve removed the damaged mailbox post, it’s time to install the new one. It’s important to make sure that, when the mailbox post has been installed, it will position the bottom of the mailbox about 45 inches above the road level.

2. Also, there should be around a 6 to 8-inch distance from the mailbox door to the curb or edge of the road. Get the US Postal specifications concerning mailbox location and measurements from the local post office.

3. Put the new post in the hole. Hold the post in a straight, vertical position using small braces.

4. Pour premixed cement into the hole and around the post, tamping it down, and then just add water.

5. Allow the cement to dry for about 4 to 6 hours. Then, attach the mailbox to your new post.

Are you not up to the task?

Let a reputable handyman do the job for you. If you don’t want to spend hours looking for a service professional, TalkLocal can help. Simply provide us the details of the service you need, and we will connect you qualified professionals in your area. What’s more, our service is completely free. Try us now.

Benefits of Teak Floor Tiles

Wednesday, December 11th, 2013

Benefits of Teak Floor Tiles - Handyman

If you want to install new floor tiles at home, it is recommended to opt for premium products made from high-quality materials, like teak for instance. Even though they may cost a little bit more than basic options available online and in brick-and-mortar stores, teak floor tiles will save you time, money, and effort in the long term.

Why Are Teak Floor Tiles An Amazing Alternative?

Want to change those old, boring, unappealing, deteriorated floor tiles? In this case, consider opting for teak floor tiles. They are very fashionable and extremely popular these days, especially due to their long list of advantages.

– Teak floor tiles are durable and extremely resistant in most environments.

– Their condition is not affected by water spills, since this material can withstand moisture and wear better than its main competitors.

– Teak contains natural oils that keep wood-eating pests at a distance.

– Teak can age naturally in a beautiful manner, and most owners don’t feel the need to treat it to preserve its unique charm.

What are the Main Disadvantages of Teak Floor Tiles?

Even the very best flooring materials have their fair share of disadvantages worth considering. Teak floor tiles do not make an exception. Here are three of the most important drawbacks that you should start weighing, before making a final decision.

Costs: High demand makes all teak varieties very expensive, compared to basic hardwood flooring materials, which are widely available and less fashionable.

Endangered Species: When you buy teak, you have to make sure that it comes from a sustainable source. Your teak floor tiles should be FSC (Forestry Stewardship Council) certified.

Maintenance Issues: While it’s true that teak can age naturally without requiring any special treatment, some owners feel the need to oil it sporadically (every 2 or 3 years) to preserve its value, amazing looks, and its natural properties.

Ask an Expert

Not sure if the advantages of teak floor tiles can actually outweigh their main disadvantages? Make an informed decision by consulting a handyman. Find the best one in your area with TalkLocal, a free service designed to connect you with top professionals in your area.

The Ultimate Guide to Hot Tub Chemicals

Monday, December 9th, 2013

The Ultimate Guide to Hot Tub Chemicals - Handyman

As you sit in your hot tub, letting go of the stress that has accumulated over the day, you notice particles of dirt starting to float above the water. You think about giving your hot tub or spa a much needed break. The first thing that comes to your mind is reading about the chemicals and the maintenance tips on keeping the spa or hot tub clean. This is a guide that can help you master spa maintenance.

Everything You Need to Know About Spa Chemicals

If you wish to make the most of your spa or hot tub, you need to be very particular about its maintenance and cleanliness. Spa or hot tub chemicals and filters are the two most important contributors in the health of a spa.

There are innumerable types of spa chemicals available on the market today. You need to understand that the functions of the spa chemical are linked to the sanitation and sparkle of the hot tub or spa. In order to maintain the spa or hot tub condition,s the chemical balance of the water inside these vessels should be checked every week.

Even though the chemicals are required for sanitizing the water, too much off the sanitizing chemical inside the water can make your skin feel itchy and also cause rashes. Therefore, while using these chemicals,you need to ensure that the ratio of the chemicals that you use is per the requirement of the capacity of the water in the spa.

Two of the most commonly used spa or hot tub chemical sanitizers are chlorine and bromine. While both are equally good in cleaning up the water, many people prefer bromine because it has a neutral odor. However, chlorine gives out a very unpleasant odor when used to clean spa or hot tub water.

Sanitizing chemicals for your hot tub or spa are available in different forms: granules, tablets, and liquids.

Spa Boss Chemicals and Their Use

Apart from sanitizing chemicals, you also require spa boss chemicals for the maintenance of your spas and filters. There are also other types of chemicals including pH balancers and test strips. Spa boss chemicals, however, are an important type that helps to balance the pH levels and alkaline levels of the water in the hot tub or spa.

Need Spa or Hot Tub Help?

Using the right spa chemicals for your hot tub or spa is essential for the overall health of your spa or hot tub. Be sure that you use the user manual for understanding the chemical requirement of your hot tub or spa. If you are preparing your hot tub or spa for a cleansing session, check out some tips from Master Spa. You can also win a free Chemicals and Filters supply by entering the giveaway contest being presently run.

If you want to find a hot tub professional in your area, just use TalkLocal. We’ll connect you with up to three professionals in your area in just minutes.