
What Should I Include In My Will?

Sunday, May 12th, 2013

What Should I Include In My Will - Lawyers Family

Writing a will is not an easy task, but one that has to be done it most situations. One of the most crucial questions asked by people who are writing a will is: What should I include in my will? There are several things that are commonly included in wills. Some are necessary and others are only added under special circumstances or at the wishes of the writer. Here are some of the most important things to include in your will.

What To Include In Your Will

– The will should be clearly written and contain your own personal information. You never know if someone will want to test the will or claim it was not written by you. Make sure your name, address, and other personal information is included in the will. You also must write that the will is your last one and should replace any other wills that may have been written before it.

– Choose an executor. This is the person that makes sure your will is followed after you have passed away. This can be a friend, family member, or even an attorney. Make sure the name of the executor is clearly written in the will. You should also write in the will that the executor has your permission to manage your estate. Keep in mind that an executor cannot also be a beneficiary of your will; they must be a neutral party.

– Request to have all of your bills and debts paid off at the time of your death. This means the executor will have to use any money in your estate to pay off your debts before the money and assets can be handed out or sorted otherwise.

– Decide how you will divide your estate and assets and choose your beneficiaries. Be very precise and make a list of who should get what. The more details you can give about an asset, the easier it will be for the executor to make sure your will is followed correctly.

– If you have children or pets and you want to make sure they are taken care of after you have passed away, you should choose a caregiver and state this information in your will. This is one of the most important parts of writing a will.

Nobody wants to think about how their family will handle life after they have passed. Writing a will is not only the responsible thing to do, it can also give you and your family peace of mind. Now that you know the important things to add in your will, you can have an answer ready when a friend or family member asks: What should I include in my will?

Seek Legal Help

The process of drafting a will is complex and requires the watchful eye of a legal professional. You can personally find one in your area by using TalkLocal. All you have to do is type in information about the lawyer you are looking for and we’ll track them down for you. It’s that easy.
What To Do When Your Brakes Fail

Sunday, May 12th, 2013

What To Do When Your Brakes Fail - Towing

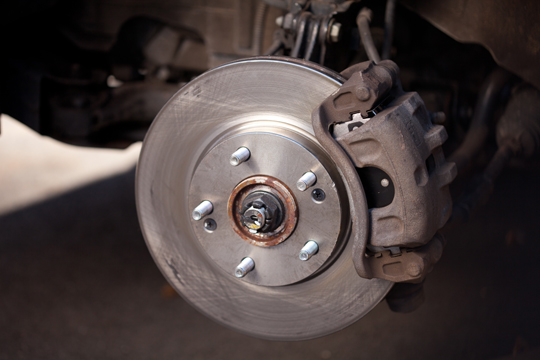
Hopefully you are never put in this scary situation, but it is important to know what to do when your brakes fail. Brakes are, for the most part, reliable, but there are a number of rare instances that will render your vehicle’s brakes useless. In this event, it is important not to panic or do anything hasty, like purposely drive into something. Making the wrong decision in this scenario can cause harm to your vehicle, and more importantly, you and your passengers.

Here is some information on what do when your brakes fail.

Pump the brakes: Your brakes might not be out completely — your brake fluid just might be dangerously low. Try pumping the brakes first in order to determine whether you truly have lost all ability to use the brakes.

Downshift: If you are driving a vehicle with a manual transmission, begin downshifting the vehicle immediately. Changing gears will naturally slow the speed of the vehicle down. This will not be much help for those driving automatic vehicles. However, in both situations, make sure not to apply any more pressure to the gas pedal so the vehicle can decelerate.

Pull the emergency brake: While it might not allow you to stop entirely, using the emergency brake can slow you down significantly. Slowly pull the emergency brake up instead of yanking it up quickly.

Stay attentive and warn other drivers: Keep your eyes on traffic and respond accordingly. It helps to turn on your hazard lights or constantly honk the horn to alert other drivers that your vehicle is not operating in a proper fashion. Often, fellow motorists can take the hint and get over to the side of the road, out of your way.

Merge to the right: Get over to the far right of the road so that if you can come to a safe stop, you will be over on the shoulder where responders can assist you.

Make a judgment call: If you must crash into something to come to a complete stop, assess the dangers of your surroundings. Do everything you can to slow the vehicle down before you collide with anything. You can slow up immensely by hitting a curb, but it isn’t wise to do that if there are numerous pedestrians in the area. You must account for your safety and the safety of others.

Get A Tow

Once you learn the hard way what to do when your brakes fail, you will likely need your car towed somewhere to be repaired. TalkLocal is perfect for situations where you need to get ahold of a professional in a hurry. Our service requires a mere 90 seconds before a qualified professional calls you, instead of the other way around.

Using Salt In The Garden

Sunday, May 12th, 2013

Using Salt In The Garden - Landscapers

Are you looking to fertilize your garden but want to shy away from the harsh chemicals of traditional fertilizers? Using salt in the garden might be your answer.

What Epsom Salt Can Do For Your Garden

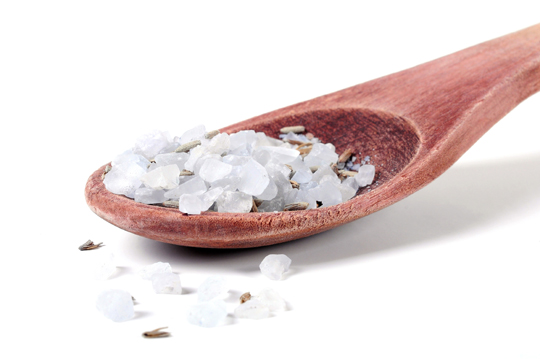
Using Epson salt — which is salt in its natural mineral form — is a practice which has been utilized by organic gardeners for a long time. Epsom salt is rich in both Magnesium and Sulfate. These are two minerals that plants and some flowers can put to good use, making for thriving, lush, green plants in the garden. Magnesium is key in seed germination and plays a role in photosynthesis. Sulfate is also important in the production of chlorophyll.

Adding Epsom salt is important, because these minerals are not always naturally found in the soil at sufficient levels.

Applying Epsom Salt To Potted Plants

While expert plant growers continue to debate on whether salt really aids the growth of plants, adding salt to a garden or potted plants is easy and certainly will not present any negative side effects.

You can add salt to potted plants to help them grow better. To apply salt to potted plants:

1. Dissolve two tablespoons of Epsom salt for every gallon of water.

2. Put this water/salt solution in a watering can.

3. Pour the water on the potted plants. Water your plants with this mixture for about a month to give them a chance to absorb the water and minerals of the Epsom salt.

Using Salt to Plant Plants In A Garden

Using salt in the garden when you first plant your plants is ideal. The salt can be most effective when the plant is in its early stages. To do this, simply spread around 1 cup of Epsom salt per 100 square feet of soil. This is done before you install any of your plants. Work the salt into the soil and then place the plants. This will hopefully help young plants and germinate seeds.

Finding Help In The Garden

Professional landscapers know how to maintain beautiful looking yards and gardens. If you a need help from a local landscaper, use TalkLocal to find one. Once you submit your inquiry, we’ll have you on the phone with someone who can help within 90 seconds.

How To Correctly Perform A Crunch

Sunday, May 12th, 2013

How To Correctly Perform A Crunch - Personal Trainers

A crunch is one of the most popular abdominal exercises out there, and one that personal trainers use to whip their trainees into shape. It’s not as intense as a full sit up, but it offers a lot of the same benefits. No matter how many of them you do, you won’t enjoy the benefits unless you know how to correctly perform a crunch. The guide below can help you with just that.

How To Correctly Perform A Crunch:

1. Start by lying on your back and looking towards the ceiling. Make sure you’re lying evenly and not tilting your body in any way. You want your weight to be evenly distributed. Try lying on a thin mat if the floor is too hard for you.

2. Bend your knees and plant your feet firmly on the ground. Bend your knees in a way that is comfortable and natural feeling. They don’t have to be completely bent so your calves are touching your thighs, but they need to be raised more than a few inches off of the ground.

3. There are multiple ways to use your arms while doing crunches. You can lace your fingers behind your head, cross your arms over your chest or make fists and keep your arms straight down at your side. Most beginners feel that keeping their arms crossed over their chest is the easiest way to avoid hurting their neck or trying to use their hands to pull themselves up.

4. Now that you’re in position, you want to use your abdominal muscles to pull yourself up. Make sure you’re moving through your shoulders. Basically, move by lifting your shoulders off of the ground. One big mistake to avoid is moving your neck to crunch up. Don’t do this. Use your shoulders and keep your neck straight and as still as possible to avoid injury.

5. You don’t have to come up all the way to your knees. Come up about half way or as close as you can get, hold it for a quick second, and slowly lower yourself. Repeat this as many times as you can.

Remember that crunches tone and strengthen your abdominal muscles, but healthy eating is perhaps the most important factor for getting and staying in shape.

Feel The Burn With A Trainer

If you need help with diet and exercise, you may benefit from hiring a personal trainer. Talk Local can help you find those fitness professionals in your area to get you on the road to a more fit, toned you.

Show A Little Appreciation This Mother’s Day

Sunday, May 12th, 2013

mothers day

The loving human mother is an especially amazing specimen. Her highly-evolved offspring requires among the longest incubation period of any species. The nutrient deprivation and extended period of vulnerability inherent in this process alone is daunting, even if infants were born walking and nearly self-sufficient, like other offspring.

Instead, the trajectory of post-natal development rendered this impossible, even for our primate ancestors. Add to that the unique demands of civilization, and you have a highly-involved breed of mothering which often becomes a fixed pattern of behavior for life. What makes this even more astonishing is that, due to a complex brain structure, the human mother is uniquely unrestricted by mere instinct. She is freed from the reigns of genetically prescribed behavioral patterns; so love is nature’s only possible weapon to ensure the caring sacrifice of a mother for her child — so integral to the continuance of our species.

Let’s show all of the mothers in our lives a little appreciation this Mother’s Day, and every day. You could even treat your mother to her own special day, fit with flowers, a day at the spa, her own personal chauffeur for the day, or a full, professional cleaning of her home.

Happy Mother’s Day!

The Seva Call Team

Recycling Plastic Grades

Saturday, May 11th, 2013

Recycling Plastic Grades - Garbage Removal

Lately, it seems everyone is working harder to do the right thing and recycle to help our planet flourish. It can get hard, though, when you don’t know if you can even recycle something. You don’t want to throw it out if it could be recycled, but you don’t want to put it in the wrong space. With so many types of plastic, knowing how recycling plastic grades work can help make your life a lot easier.

There are seven different types when it comes to recycling plastic grades, which can be found somewhere on your plastic (usually the bottom) inside of the little recycle triangle made of three arrows. The grades are:

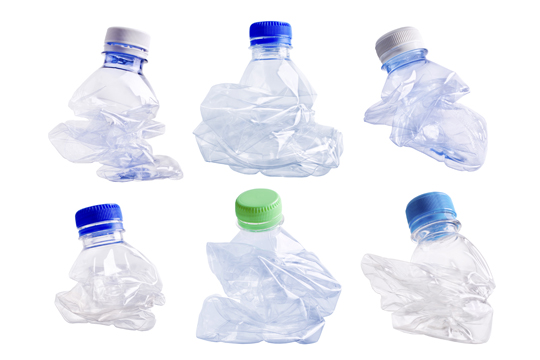
PETE or PET: These are made with polyethylene terephthalate. These are usually water bottles, soda bottles, peanut butter jars, etc. These can be recycled into new containers, polar fleece, carpet, and even more. They can be tossed in any commercial recycling bin or picked up by your neighborhood program.

HDPE: These are made with high-density polyethylene. They’re really thin and used for things like plastic bags, yogurt jars, etc. They can be tossed in any commercial recycling bin or picked up by your neighborhood program.

Vinyl or PVC: This type is usually used for holding household cleaners. They are not often recycled, but some centers will take them; you’ll need to call your local recycling center and inquire. They can be recycled into a few products, but they release a lot of toxins from the chemicals, which makes recycling by melting very dangerous.

LDPE: These are made with low-density polyethylene, which means they’re very thin. This is the type of plastic from which shopping bags come. These are not commonly accepted by curbside programs, but most grocery stores which use them offer drop-off locations.

PP: This plastic is made of polypropylene. This is what condiment bottles, straws, and medicine bottles are typically made of. More often than not, curbside programs will accept it.

PS: Made of polystyrene, these make up styrofoam cups, egg cartons, and carry-out food containers. These can be recycled, but rarely are they. You’ll have to inquire with your local program to find out.

Miscellaneous: This is pretty much anything else. Rarely can these items be recycled.

Contact A Garbage Removal Expert

If you need more information on whether other common items can be recycled, or if you need assistance with garbage removal, we’ve got you covered. At TalkLocal, we take the work out of your search. That way, you can get your work done and focus on what really matters.

What Is Active Release Chiropractic Therapy?

Saturday, May 11th, 2013

What Is Active Release Chiropractic Therapy? - Chiropractors

If you have experienced chronic headaches, back pain or an injury that seems to have hung around, you may be researching treatments and ask yourself: What is active release chiropractic therapy?

Active release therapy, also known as “Active Release Treatment (ACT),” is a patented method of relieving a variety of soft tissue ailments. It is noticeably different from other forms of massage therapy.

It was designed in 1991 and patented in 1995 by a chiropractor named P. Michael Leahy and is now a verified method of treatment that many chiropractors and other health professionals certified in soft tissue treatment are able to attain training in.

What Purpose Does ACT Serve?

ACT is designed to break up scar tissue in overworked or injured muscles as well as to alleviate over-tightened or shortened muscles that may be causing nerve pain. Additionally, the treatment is able to clear adhesions to tendons, muscles, and other soft tissues.

How Does It Work?

The treatment works in phases. The practitioner will stimulate and stretch the affected area in a variety of tested ways. By the final phase, the patient will help by actively stretching and moving the area while the practitioner applies tension at specific locations. Greater success has been shown when the patient is able to participate in his or her own recovery.

What Can It Treat?

Active Release Chiropractic Therapy can treat many soft tissue problems such as carpal tunnel syndrome and other peripheral nerve entrapments, spinal pain, or dysfunction, in addition to tendonitis and other inflammatory problems of the hand, wrist, elbow, shoulder, hip, knee, ankle, and foot. Additionally, sufferers of TMJ, sciatica, and sprains and strains that tend to reoccur have seen improvement.

Where Can I Get Treatment?

Only those licensed in ACT will fully be able to answer the question: What is active release chiropractic therapy? It is different from any other massage therapy techniques and is usually administered by a qualified chiropractor. To find one, try out TalkLocal’s free service. We’ll locate a professional in your area at no cost to you.

How To Remove Paint From Glass

Saturday, May 11th, 2013

How To Remove Paint From Glass - Handyman

It happens to the best of us: while trying to freshen up the trim around your windows, you unknowingly splatter paint on the glass. It’s a common mistake, after all, you’re probably not a professional painter.

If you realize the misstep, a quick swipe with a wet cloth can remediate the problem right away. But what if you are on a roll and just don’t see it? You may be left wondering how to remove paint from glass. Don’t worry — we’ve got you covered.

How To Remove Paint From Glass

1. Determine the type of paint (i.e. acrylic, latex, oil-based). Often the paint can will include a label with information on chemical solutions that will remove the paint.

2. Use a straight razor blade to lightly scrape off the paint. If possible, use a piece of cardboard to lightly press on the other side of the glass to prevent breaking. Rather than rubbing the blade, this step should focus on lifting the paint. When the blade gets dull, replace it. Pressing harder may break the glass.

3. If paint remains, use the correct chemical solution for your type of paint and apply according to product directions.

4. After removing the chemical paint stripper, wash the window with soap and water prior to applying a chemical glass cleaner. You do not want the chemicals of the stripper to mix with the chemicals of the cleaner, as it may create harmful gasses.

5. If small flecks of paint still remain, your razor should be able to remove them fairly easily.

Th-s process may be a bit time-consuming and require some elbow grease, but the result is a sharp, clean look to your home. After going through this process once, you will never again need to ask how to remove paint from glass because the process is relatively simple. You also may consider hiring a professional painter to avoid the issue next time altogether.

Further Assistance

If you are still having trouble, or have a massive project to tackle, you may consider hiring a professional handyman to remove the paint. TalkLocal can find you one in your area for free.

How To Repartition A Hard Drive In Windows 7

Saturday, May 11th, 2013

How To Repartition A Hard Drive In Windows 7 - Computer Repair

Disk partitioning is useful for a lot of things and is made possible quite easily with Windows 7 and Vista.  The actual act of partitioning is separating a hard drive into multiple volumes. This is useful because it allows data on one volume to be stored and accessed independently from another. This mean if something happens to the partitions index file you can still reboot from another partition.

How To Repartition A Hard Drive In Windows 7

The first thing you should always do is back up your important files so that in the event that something goes wrong, you can recover any desired information. Here are the steps on how to repartition a hard drive in Windows 7.

1. Go to the Start Menu, right click on Computer, and select Manage.

2. Next, go to Storage and select Disk Management. This will show you all of the storage space that your computer can access.

3. Select the hard drive that you want to partition, right-click, and select Shrink Volume. This will scan your drive to show you how many megabytes you have available in storage space.

4. Next, type in the amount of space you want for the partition (Note: 1024 MB = 1 GB).

5. Now you’ll see the partitioned segment you just created, which will be unallocated. Right-click and select New Simple Volume.

6. The New Simple Volume Wizard should pop-up. This wizard allows you to specify a drive letter, mounting and formatting options, as well as the option to rename the volume. Click finish and you’re all set. You have successfully repartitioned your hard drive.

You can also check out the Microsoft Windows online forum for further questions with repartitioning a hard drive.

Need Help With Your Hard Drive?

If you have a Mac or another operating system and this tutorial is not an option for you, don’t worry. Simply go to the TalkLocal website and submit a request. In seconds, you will receive from calls from up to three local computer repair technicians who can provide you with professional assistance.

Pets For An Apartment

Saturday, May 11th, 2013

Pets For An Apartment - Veterinarians

Before you consider getting any pets for an apartment, carefully read your lease and consult your landlord. Many apartments do not allow pets, or have restrictions on pets. If you are allowed to have a pet, verify which animals are permitted and which are not. In general, small, quiet animals are good apartment pets.

Fish

Fish are probably the best apartment pets because they do not take up space, they are relatively low-maintenance, they are cheap, and they are quiet. Your neighbors and your landlord will never know you even have pets! The most common fish that are kept as pets are goldfish and betta fish. You may keep several goldfish in the same fish tank, but you must always keep betta fish separated from all other fish—even from their own species! Betta fish are beautiful but fierce, and will kill any fish that is near it.

Rodents

Hamsters, mice, rats, gerbils, guinea pigs, chinchillas, ferrets, and rabbits are apartment-friendly pets. They are small and easy to take care of. Just be careful to not let it out of its cage or out of the apartment. Some of them, like rabbits, can be trained to use a litter box, which is useful for cleanup. Rabbits need space for exercise and play time, so make sure they can hop around.

Amphibians and Reptiles

While you may scare your neighbors and guests, amphibians and reptiles are cool apartment pets as long as they stay in their tank. Frogs, geckos, lizards, and snakes are silent and fascinating to watch. If you are bold and daring, these are the pets for you. Make sure to keep a weight on top of their tank, as some of them can escape.

Cats

If you are looking to cuddle your pet and not keep it caged, cats are great pets for an apartment. Although they can be more expensive than the aforementioned animals, cats are fun pets. Cats are also more hands-on than other pets, so they require attention and play time, as well as exercise.

Birds

Birds  can be good pets, but they can also be loud. Some birds chirp and squawk loudly, which might annoy some of your neighbors.

Dogs

Dogs usually need space to run around or else they get bored and chew up your apartment. Also keep in mind that many apartment buildings have restrictions on the breed and weight of your dog. “Aggressive” breeds like German Shepherds, Pit Bulls, Rottweilers, and Dobermans are frequently prohibited from apartments. Some apartments even require that you dog weigh less than 20 pounds.

Properly Care For Your Pets

Make sure you have a reliable veterinarian to take care of all of your critters. TalkLocal can help you find quality vets in your area. Just tell us what you need and your availability, and we will connect you with up to three veterinarians for free!