Archive for the ‘Handyman’ Category


Porch Column Repair Kit to Restore the Beauty of Your Porch

Wednesday, March 26th, 2014

Porch Column Repair Kit to Restore the Beauty of Your Porch - Handyman

By design, porch columns typically hold significant weight, whether from the roof or a second story area. As such, it is important to ensure that porch columns are strong enough to support the structures of your house. However, porch columns are naturally exposed to weather conditions and they eventually are damaged.

The top and bottom of a porch post have the tendency to deteriorate or rot. Porch columns also tend to split without proper maintenance. Fortunately, rot and other types of damage can be easily repaired and reversed with a basic porch column repair kit. Do not attempt to repair severely damaged columns.

Dealing with Wood Rot

1. Stop the spread of wood rot by removing the rotted section of the column. Make sure there is no drop of moisture on the remaining material. If necessary, leave your work area open for a couple of days to allow moisture to evaporate.

2. Use water putty or an auto body-filling product to fill in the damaged sections.

3. Sand the post into shape with the appropriate sanding tool.

4. For large rotted sections, cover them with new material from crown molding or baseboard. Nail the cover in place. Use silicone caulk to seal any seams.

5. Paint or apply stain to match the existing surface.

Fixing Cracks and Missing Areas

1. If the wood grain of your porch columns has vertical cracks due to drying, you’ll need to have wood glue (exterior grade) in your porch column repair kit and apply this into the cracks of the wood using a large syringe.

2. Wrap the column with double-strap clamps, placing clamps each at the top and bottom of the crack. Tighten the straps and cinch them up together with a ratcheting clamp until the crack seals.

3. Clean up the excess glue on the column. Leave it overnight to dry.

4. Apply water putty or auto body filler into any missing areas. Color the putty with dye stain or paint to match the rest of the porch column.

Applying a New Coating

1. If the paint on your old porch is already faded or chipped, it’s high time to give it a fresh coat of paint or stain.

2. Bring out your porch column repair kit and start by sanding down the column to its base material. Use a belt sander to quickly sand big sections and use small sanding device or hand sanding for details.

3. When it comes to the type of paint, go for exterior house paint with semi-gloss latex finish. If applying wood stain, apply clear finish over the stain. Painted columns should be primed first.

4. Using a fine bristle brush, apply paint in long, even and vertical strokes without any drips as much as possible. Make sure the first coat is already completely dry before applying the next coat.

No Time to Repair Your Porch?

TalkLocal can save you time finding a qualified local handyman who can do any porch repair job. Contact us and you’ll be in touch with service professionals in no time.


Patio Surface Ideas

Monday, March 24th, 2014

Patio Surface Ideas - Landscapers

A fantastic outdoor patio can boost the resale value of your property and enchant the eyes of all your neighbors and guests. Want to beautify your outdoor space? In this case, you could try to implement your own design ideas by conducting a DIY project or you could hire a landscaper and let him do the heavy lifting. Either way, here are a few popular patio surface ideas that you may want to consider.

Find the Best Surface Ideas Based on Your Favorite Style

To begin, analyze your expectations and your design requirements. Do you prefer structures that reflect a contemporary, modern, traditional, or an eclectic style? Check out different sources of inspiration available online to make an informed decision.

Choose Wisely

There are countless patio surface ideas that may raise your enthusiasm. Nonetheless, it is advisable to weigh the pros and cons of each option before making a final call. Stone, brick, marble, and concrete are only a few candidates for this job. Pick the right one for you based on several factors, including:

– Costs

– Versatility

– Availability

– Upkeep

– Resistance and durability

– Design requirements

Concrete patio surfaces are extremely versatile. You could play with different colors, finishes, and stamp patterns to obtain a truly unique, eye-catchy design. Patio tiles are an excellent option, especially those improved by adding granular sand to make them less slippery.

Brick pavers look amazing, are very durable, and are available in different statement colors (including those gorgeous shades of red) that are easy to mix and match.

Even though it is relatively easy to design and build, a gravel patio may not be the best thing for you for a number of reasons, including it requires time-consuming upkeep and it is fairly messy.

Ask an Expert

Don’t know how to identify the best patio surface ideas for your property? In this case, rely on expert advice provided by a competent handyman. Find the best one in your area with TalkLocal, your #1 connection to the best professionals in your area.

Hot Tub Skirting Corners

Thursday, March 20th, 2014

Hot Tub Skirting Corners - Handyman

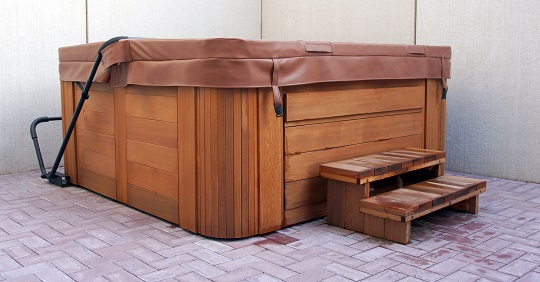
Just like any other object around the house, your hot tub skirting requires periodical maintenance to preserve its appearance and functionality for as long as possible. However, over time, due to exposure to elements and daily wear and tear, your hot tub skirting is likely to need repairs or even replacement.

Hot Tub Skirting Corners Repairs

Hot tub skirting corners are some of the parts, which are most susceptible to requiring repairs because of various reasons. In time, they can warp, crack, or become loose, which allows water to penetrate under the siding, leading to decay.

Once you notice any signs that your hot tub skirting corners are starting to deteriorate, it’s important to check them thoroughly. If your skirting is made of wood, it might be enough to refurbish them. You can do it yourself or entrust the job to a skilled carpenter if the job seems daunting to you.

In case the corners of your hot tub skirting are made of composite materials or plastic, you might have to replace them, especially if they no longer fit tightly around the lip and siding. Fortunately, you can find hot tub replacement parts by going to a home improvement store, checking with your hot tub manufacturer, or ordering them online from specialized suppliers.

Kits for Hot Tub Skirting Corners

The skirting, or box, of many modern hot tubs is made with panels and parts that come in kits, ready to be assembled. Some have interlocking systems, which makes installation easier. If your hot tub skirting has rounded corners or flex corners, as is the case with many new hot tubs, you need to measure the size of your corners, and buy or order the right type to replace your old ones. Typically, these corners go with a lip overhang, which covers the hot tub paneling. Check all the details of your hot tub skirting, and write down the specs to know exactly what you need to purchase.

Need Assistance?

If you want to refurbish your hot tub skirting without spending too much time finding qualified help, Seva Call can take this task off your hands. We can put you in touch with a reputable local professional in no time.

Flood-Proof Home: How to Protect Your Garage

Tuesday, March 18th, 2014

Flood-Proof Home: How to Protect Your Garage - Handyman

Floods are something many of us would rather not think about, but this doesn’t mean they aren’t likely to happen, against our best hopes. The best we can do in case of natural calamities is to be prepared. A flood-proof home will save you time, money, and will help you avoid stress and frustration. Your garage is part of your home, and you should protect it as well.

Here are some basic measures to flood proof your home and protect your garage.

1. Use flood damage-resistant materials, such as fiber cement.

2. Get insurance coverage.

3. Install a flood shield.

What Should You Do?

Using these basic measures, you will minimize the damage that can be caused by a flood. However, if such an event has occurred, first you need to evacuate the water from your garage or shed, following several simple steps:

– Establish if the water your garage has been flooded with is fresh or if it comes from rainfall or sewage.

– Remove all the things that you can reach without entering the water, if this is possible.

– Remove the water itself, using a bucket or a mop, depending on the amount of it.

– Dry the area and clean it.

It is important that you take action rapidly, even if you choose to turn to the expertise of professionals. Water infiltrates into things and some of them may not be saved unless you act quickly, especially if the shed is in question. Sheds are usually made of wood, which is more vulnerable to water than other materials.

If You Need Professional Help

There are situations in which it is very difficult to evaluate the damage and to do the repairing work on your own. Don’t hesitate to look for contractors who are in a position to tell what needs to be done and have the ability to solve these problems. They can also give you all the tips for a flood-proof home. If you don’t think you can deal with the damage by yourself, Seva Call can help you contact professionals who will clean the mess and eliminate any risks in no time.

Do-It-Yourself Shave Horse Plans

Friday, March 14th, 2014

Do-It-Yourself Shave Horse Plans - Handyman

If you’re interested in woodcraft or working with green wood for your wood projects, then you may want to have your own shave horse. Just like how any good carpenter requires the right set of carpentry tools, a woodworker also needs certain tools such as a shave horse to create a range of projects. It’s a brilliant tool that has been used by woodworkers even before the dark ages until now. Why not try your do-it-yourself skills by taking on shave horse plans and build this tool yourself?

Why “shave horse”?

It’s called such because one has to mount it like a horse in order to operate it, and it’s used traditionally with a shaving tool known as a drawknife to turn a piece of wood into the desired shape with the right thickness.

What does it do?

The main job of a shave horse is to grip a round piece of wood so it can be worked on. Its ability to clamp on wood is powered by the user’s legs. Pushing on a foot bar at the underside of the horse makes it hold the wood positioned on the work area. Releasing the foot bar releases the wood as well.

What does it look like?

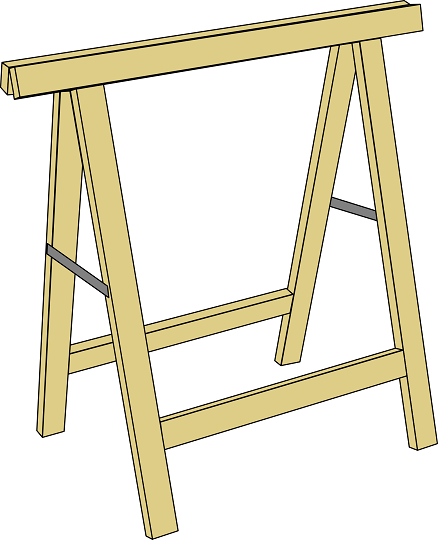
There are a number of shave horse plans with slightly different styles and variations. However, the basic design consists of a bench with legs (three-legged horses are more stable) that function as the base frame and seat for the horse. The other basic components are the foot bar, treadle frame, yoke and, of course, the hinged work area where the piece of wood is placed.

Need Carpentry Help?

Shave horses are easy to make if you already have some experience with woodwork. However, if you’re just starting out in this wonderful hobby, you may not have the skills yet to follow DIY shave horse plans. This shouldn’t stop you from owning one, though. Seva Call can help you find an experienced professional who can take your shave horse plans and build this tool for you just as you want it. Contact us now to start your search.

Fix Mailbox Post

Wednesday, March 12th, 2014

Fix Mailbox Post - Handyman

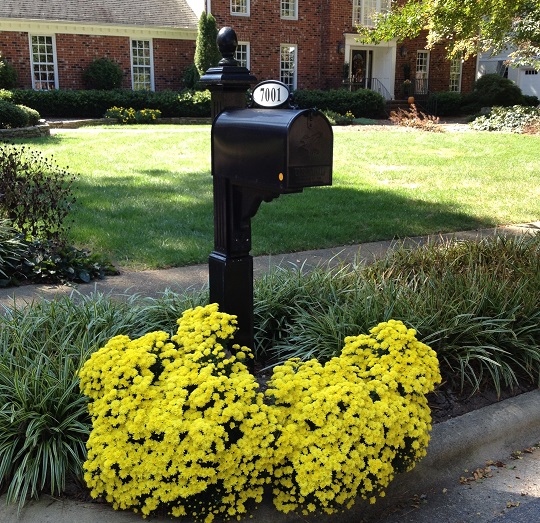
Weather, accidents, or simply time will take a toll on your mailbox post. Sooner or later you’ll have to fix or replace it. Fortunately, this is an easy job that you can do in a couple of hours. Here are the main things you need to know for your fix mailbox post project.

1. Check the Old Mailbox Post

Is your old mailbox post broken or only loose? Is it set in cement or into the ground? If it’s set in cement, you might want to change its location, because it’s difficult to remove the old cement. You can place the new mailbox post nearby or nail the new post into the old spot.

2. Find another Mailbox Post

When you plan to fix a mailbox post, you need to consider the length of the post. According to federal regulations, your mailbox post should be 41-45 inches long, so remember this when you choose a new one.

3. Prepare the Mailbox Post

To prevent rotting, it is advisable to treat the part of the post that will be inserted into the ground with a protective coating. Apply the preservative substance and let the mailbox post soak for a day before installing it.

4. Install the Mailbox Post

Dig a hole in the selected location, with a depth of about 2-3 feet. Put a layer of gravel on the bottom of the hole to allow water drainage. Place the mailbox post into the hole, and then back fill with the spoil that you dug out. Make sure your mailbox post is straight by using a level.

5. Put the Mailbox on Your New Post

The last thing to do to after installing the post is place the mailbox on it. You can use screws or nails to set it in place. Your mailbox is now ready to be used.

Need a Handyman?

Call Seva Call today and we’ll connect you with local professionals that can get your job done. It’s fast and free!

Resizing Kitchen Cabinets

Monday, March 10th, 2014

Resizing Kitchen Cabinets - Handyman

Custom-made kitchen furniture can be quite expensive. If you want to reduce expenses without making any quality compromises, think about modifying factory-made cabinets that are usually extremely affordable. Resizing kitchen cabinets can be a simple task, as long as you follow all the right steps detailed below.

How to Resize Factory-Made Cabinets in a Few Easy Steps

You don’t need to rely on professional services provided by a handyman to resize your cabinets, as long as you have lots of spare time on your hands and a basic set of tools. For excellent results, just follow these simple guidelines:

1)    Disassemble your old cabinets: remove all drawers, doors, and additional hardware pieces.

2)    Using a power saw, eliminate excess depth from shelves and the rear of the old cabinet.

3)    Reattach all components.

4)    Using the same power saw, chop the plywood sheets to the right dimensions.

5)    Install the smaller components, using nails or adhesives on the rear and on the sides of the cabinet.

6)    Attach the lateral pieces and the back of the cabinet.

7)    Remove the cabinet’s extension front, cut it and give it a nice finish; then reattach it using glue or nails.

8)    Customize your extension drawer.

9)    Resize the old drawers by chopping their sides and their bottom with the power saw. Cut as much as you need to ensure a perfect fit; then reattach the newly resized drawers using a nail gun or adhesive.

Ask for Help

Resizing kitchen cabinets can be quite a hassle, especially if you’re not a big fan of relatively complex DIY projects. If you want to simplify your mission, choose to hire a competent handyman. Find the best ones with TalkLocal, your reliable connection to reputable professionals. Use it on a daily basis to meet gifted professionals who live and operate near you.

Tips for Easy Mailbox Post Replacement

Tuesday, March 4th, 2014

Tips for Easy Mailbox Post Replacement - Handyman

Anything from severe winter weather to an out-of-control car or a group of vandals can cause damage to your mailbox post. Regardless of the cause, you will have to replace the damaged mailbox post at your own expense since the US postal service is not responsible for fixing it. Mailbox post replacement can be a real hassle, especially if you live where there is a high level of snow and it’s common for snowplows to knock down mailbox posts.

However, with some spare time and a few tools and materials, replacing a damaged mailbox post can actually be a doable task for the average homeowner. Here are a few helpful tips to install a mailbox post replacement.

Taking Out the Old Post

The hardest part of this task is to remove the existing mailbox post that has been damaged. The post may already be loose, in which case, give it a good wiggle to pry it loose. Dig some of the earth surrounding the post so you can pull out it easily. However, if the post is still quite secured by the concrete, break the concrete off with a shovel.

Dig to expose all the cement until you can lift the mailbox post to remove it. This is a physically demanding job, so please work with caution. If it proves to be too difficult to pry out the old post, just cut it off at ground level and then install the new mailbox post right next to the old location.

Putting In the New Post

When you’re ready to put in the new post, make sure the height of the post after installation would meet the local postal office requirements. If you chose to use treated wood for your mailbox post replacement, dig two inches deeper and put gravel or small rocks at the bottom up to a few inches up the hole. This will facilitate drainage and prevent rotting at the bottom of the wooden post.

Next, position a wooden stake on each side of the post some three feet away. Cut two strings and tie one end of each piece to the post and the other end to each stake. Use a level tool to ensure that the post is perfectly straight.

Then, mix the concrete and pour into the hole. Leave about 5 inches at the top. Later, you will fill this space with dirt. Let the concrete completely dry. Once it’s already dry, remove the supporting stakes and strings. Fill the top of the hole with dirt.

Finally, attach your mailbox according to the instructions in the installation manual.

Need Professional Assistance?

Seva Call can help you get in touch with a quality handyman in your area. Give us a call before you waste hours searching for the right professional, and we’ll connect you to reliable pros in minutes.

Hot Tub Skirting Replacement

Monday, February 24th, 2014

Hot Tub Skirting Replacement - Handyman

Exposure to harsh weather, daily wear and tear, and lack of proper maintenance can deteriorate your hot tub skirting. While regular maintenance can extend the life span of your hot tub skirting, helping you avoid premature deterioration and costly replacement, at some point it might become imperative to install a new skirting.

Hot Tub Skirting Replacement: Wood or Plastic

If your hot tub skirting is made of wood, it might rot over time as a result of water exposure. Ideally, you should replace it with the same type of wood. If you’re on a tight budget or want to make a change, you can find several types of plastic skirting in home improvement stores. Plastic hot tub skirting requires less maintenance, and is less prone to damage than wood, but its color can fade over time due to sunlight.

For wood hot tub skirting, it would be ideal to use the same type of wood when replacing it. In case you can’t get similar material, you can opt for lumber or plywood, which are more accessible. It’s important to pay attention to the measurements to prevent water from infiltrating into the wood.

Hot Tub Skirting Replacement Steps

There are several steps to follow in hot tub skirting replacement.

1. Remove your old skirting by unscrewing the panels.

2.  Cut new skirting panels to fit your hot tub.

3.  Install the hot tub skirting panels as instructed if you’re using a synthetic wood material kit.

If you replace your old skirting with wood, and aren’t confident about your carpentry skills, ask for professional help. Improper installation of the new skirting can ruin the material. Besides, you want to upgrade the appearance of your hot tub.

Unless you know what you’re doing, you might not get the expected results. To get the job done quickly, and enjoy your hot tub right away, you might want to leave it to pros.

Need Help?

If you need assistance with replacing your hot tub skirting, Seva Call can connect you with reliable handymen in your area in no time. You don’t need to spend time making calls. We’ll make them for you. For free.

Install Silent Panels

Thursday, February 20th, 2014

Install Silent Panels - Handyman

Some spaces, such as gyms, schools, offices, garages, restaurants, or manufacturing plants, where noise or spatial division are a concern, require a sound proofing solution to increase comfort and allow people to perform their tasks. These days, silent panels are one of the most convenient options to optimize the acoustics of your home, business premises, or public areas.

You can install silent panels in your home or work space to keep sound from getting inside, or out.

The Advantages of Silent Panels

There are many advantages to using silent panels. Here are some of the most important:

– They block sound, ensuring a soundproof environment where you can focus on your work, enjoy playing or recording music, or watching a movie in your home theater without worrying about disturbing your neighbors.

– They can divide a space according to your wish and needs. For instance, in an open-space office, you can use them to ensure privacy and increase productivity.

– They are made of light materials, and can be easily installed on walls and ceilings with the help of an adhesive.

– They are suitable for various types of spaces, both residential and commercial.

– They are resistant to impact and moisture.

– They are versatile and flexible, and can be reinstalled in a different place if you wish.

How to Install Silent Panels

Installing silent panels is easy, and involves several steps.

1. Define Your Needs

Look at the space you want to sound proof and make a sketch if necessary to see how many silent panels would fit your purpose.

2. Establish Silent Panel Location

Measure the walls and ceiling and think about silent panel size to get an accurate idea about the installation.

3. Install Silent Panels According to Manufacturer Instructions

Usually, silent panels come with impaling clips onto which you apply a special adhesive, and then screw the clips on the wall. It’s recommended to use four or more clips per silent panel to make sure it stays attached to the wall.

Need Help?

If you need assistance with silent panel installation, look no further. Seva Call can connect you with a local handyman who can soundproof your space in no time.